
Mielött a Corelban a shinedot 2 szürövel elkezdesz dolgozni ajánlatosnak tartok egy kis elömunkálatot a mentésekhez a beállításokat illetöen.
Before starting to work with the Sinedot 2 filter in Corel, I consider it a little bit of work to do with the backups save for presets

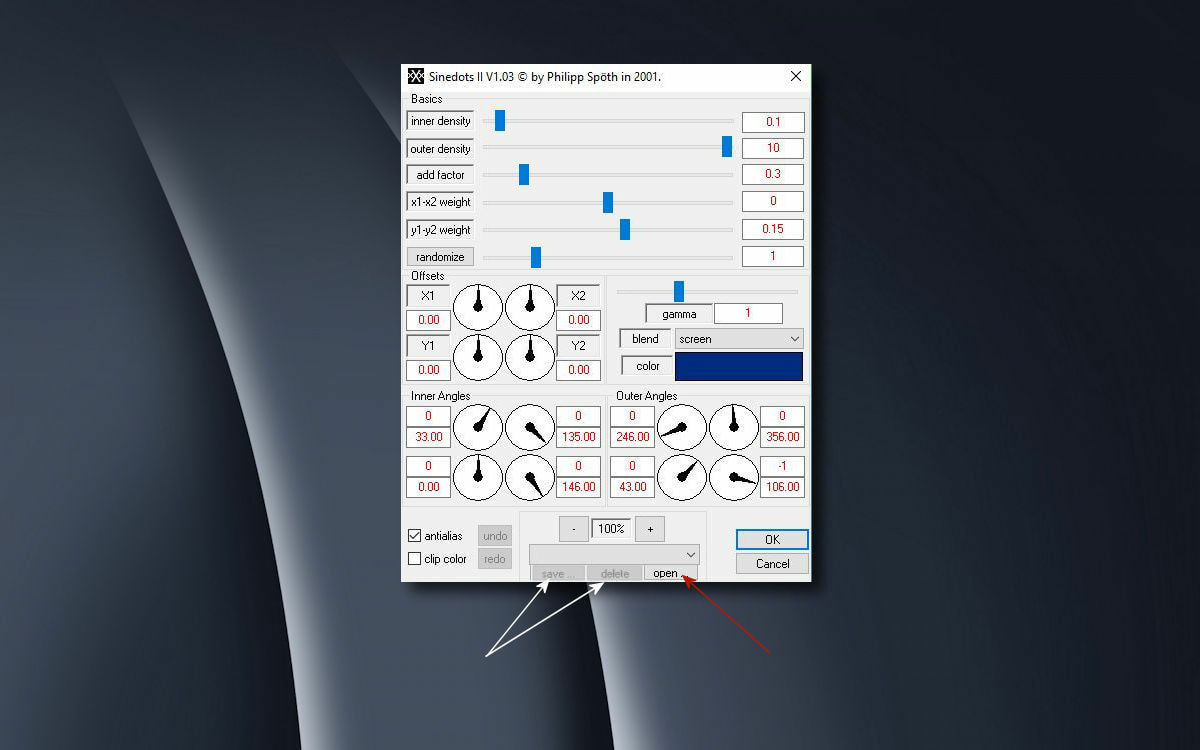
1. Amikor elöször kinyitod a berakott szürödet a Corel programodba kinyitod a szüröt és csinálsz egy beállítást, általában a save és a delete gomb nem aktív csak az open.
Ha kinyitod az opent nincs a könyvtárban semmi. Elöször azt aktívvá kell tenni.
When you first open your loaded filter in your Corel program, and make a setting, usually save and delete tab are not active only the open.
If you open the open tab there is nothing in the library.
First it should be activated.
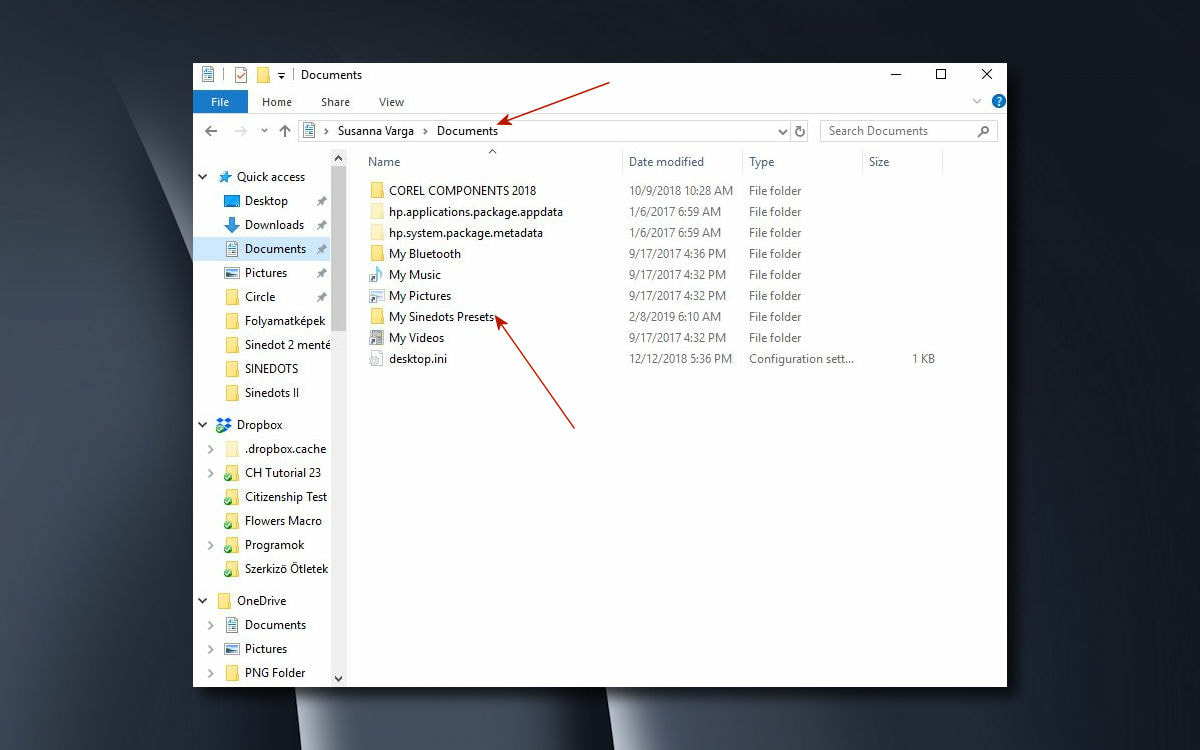
2. A további munkához azt ajánlom,hogy nyiss egy könyvtárat a dokument file alatt
és nevezd el a saját shinedot beállításokra utaló névvel.
For further work, I recommend that you open a directory under the document file and name it with your own shinedot presets.
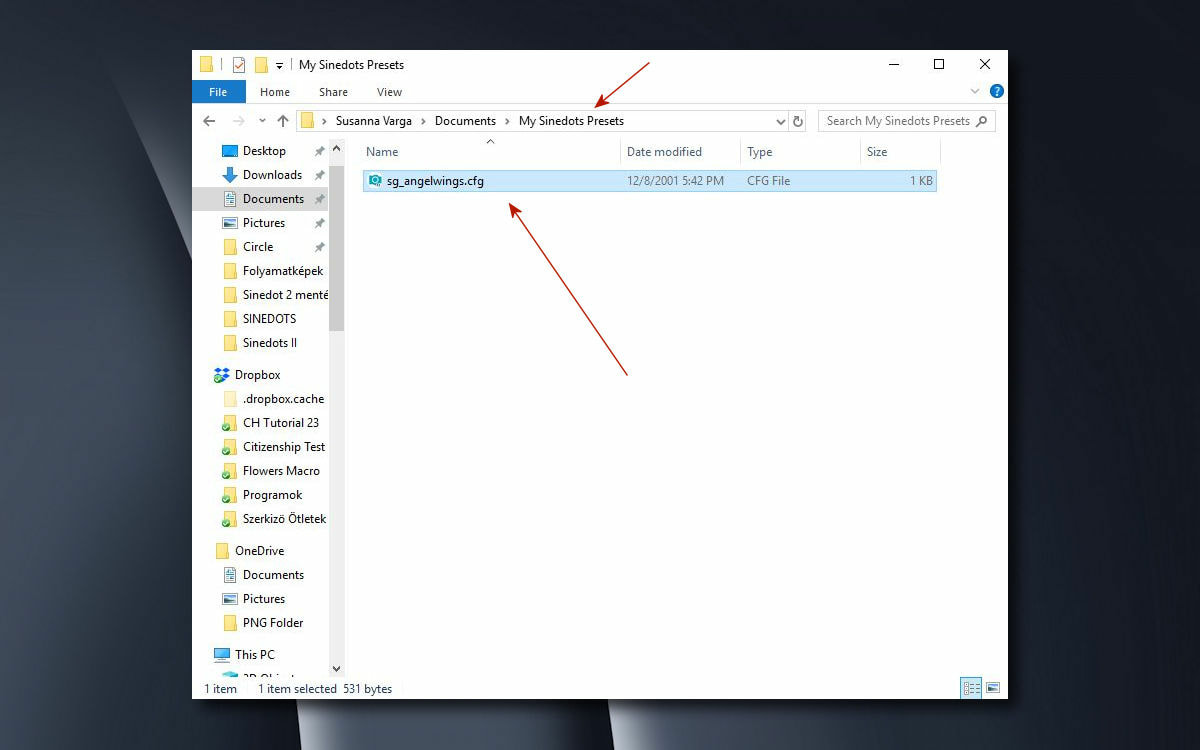
3. Mielött visszamész a programba minimum egy .cfg filet be kell tegyél ebbe a könyvtárba, hogy aktiválódni tudjon. Itt a lap alján megtalálod ezt a filet amit
a képen látsz és tedd be a kicsomagolás után az új könyvtáradba.
Before you go back to the program, you must insert at least one .cfg file into this directory to activate it. Here at the bottom of the page you will find this file you see on the picture and put it in your new directory after unziping.
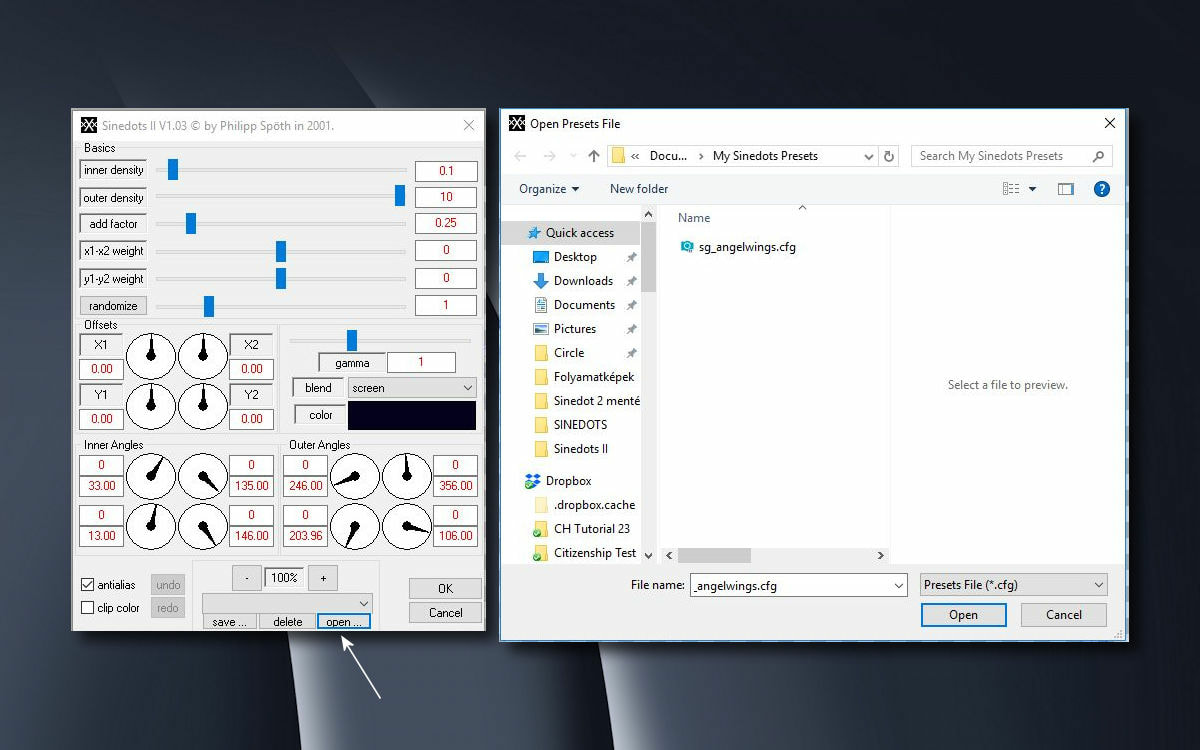
4. Most nyisd ki a programodat hozz be egy üres hátteret és nyisd ki a szürödet.
Kattints az open gombra és nyisd ki azt a könyvtárat amit létrehoztál és benne van
az a .cfg file amit beletettél.
Now open your program and load in the new transparent background and open
your Sinedot 2 filter.
Click on the open button and open the directory you created and contains the .cfg file you inserted.
5. Mostmár aktív minden gomb és el is mentheted a saját beállításodat késöbbre.
Now all the buttons are active and you can save your own settings later
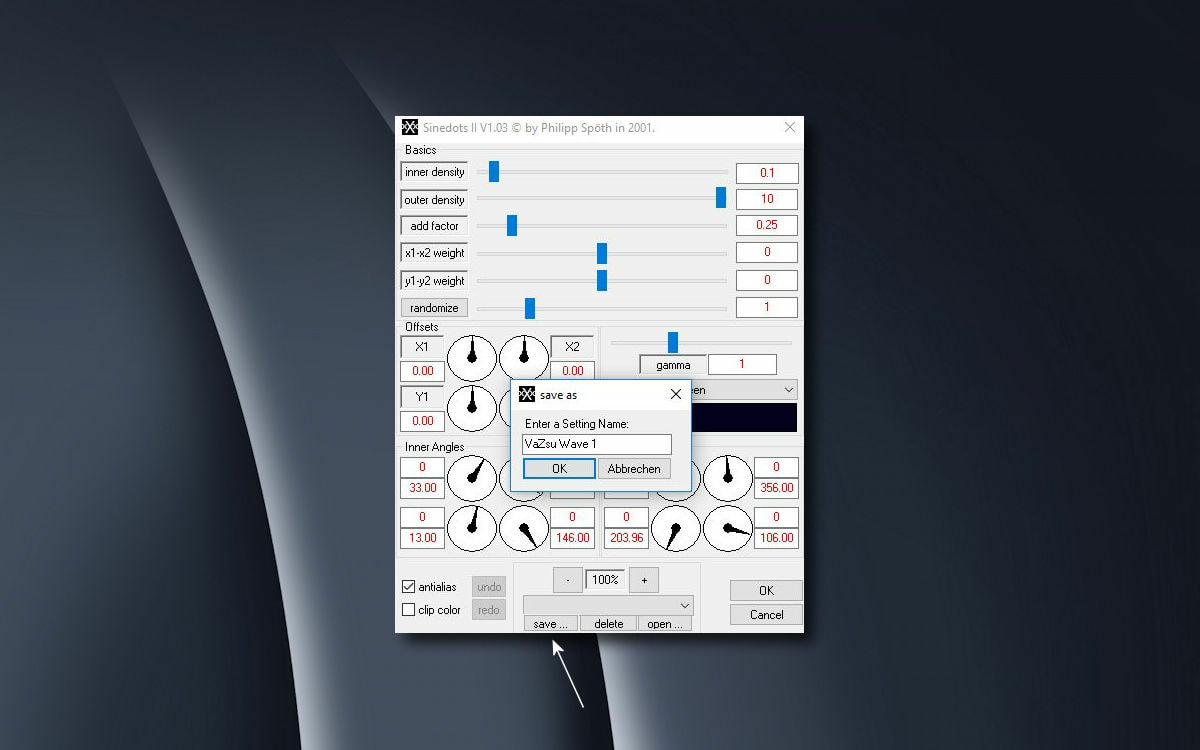
6. A név amit elmentettél mostmár látszik a könyvtárad sorában.
The name you saved now appears in the line of your library.
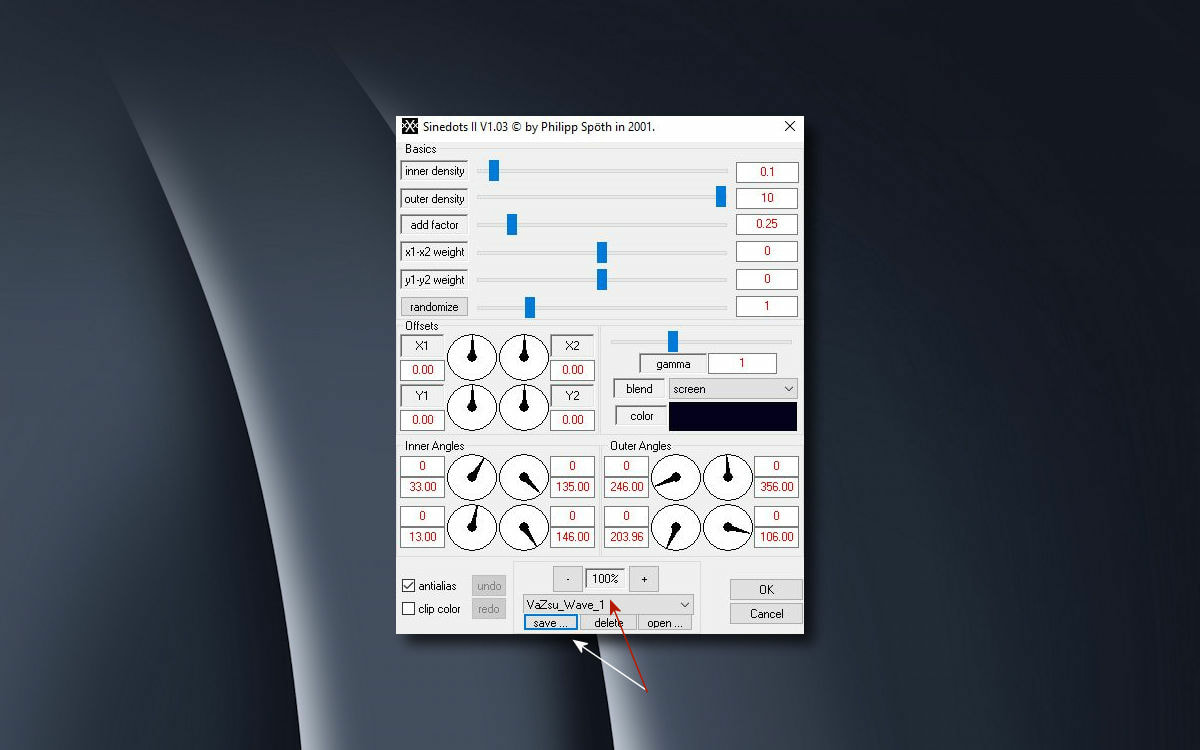
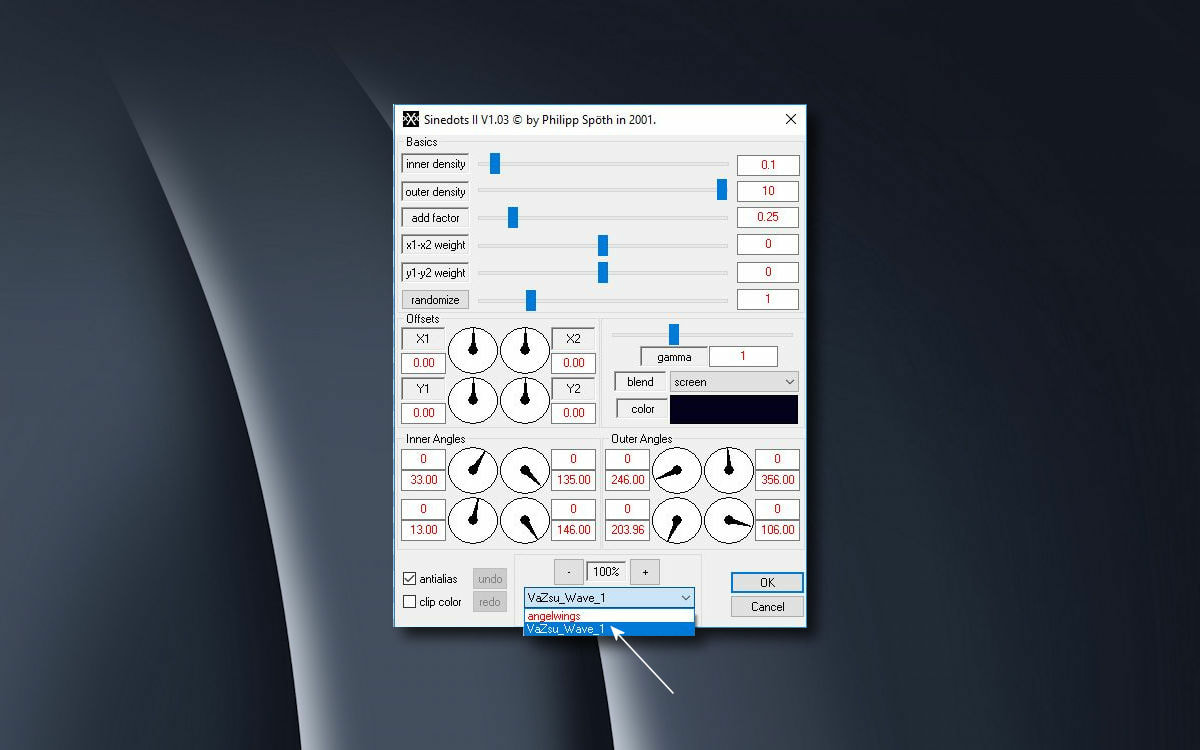
7. Ha kinyitod a könyvtáradat mostmár 2 .cfg file van ott. Az egyik amivel aktívvá
tetted a másik amit te magad mentettél oda. Ne feledd azt sem, hogy amikor itt
mentsz valamit akkor nem a képedet mented el, hanem a beállításokat.
( presets-eket csinálsz )
If you open your directory now there are already 2 .cfg files there. The one which is activate the file folder, the other what you saved yourself.
Don't forget that when you save something here, you didn't save your image but
save the image settings.
(You make presets)
Most töltsd le a filet csomagold ki és a bemutató alapján végezd el a müveletet.
Köszönet "Essex Girl"-nek ezért az angyalszárny beállításért.
Now download the file and unziping after that do what you see here in the tutorial.
Special thanks to "Essex Girl" for this angel wing setting.

| sg_angelwing.zip |