

Ebben a bemutatóban érdekes módon készítünk különleges keretet a szerkesztési folyamatban. De továbbra is megtartjuk a szokásos stílusunkat.
Külön köszönet Cady-nak a nöi tubeért. Mégtöbb tubet itt találsz töle.

| t_235_pack.rar |
Special thanks for my friends for translate this tutorial to French, Dutch and German language.


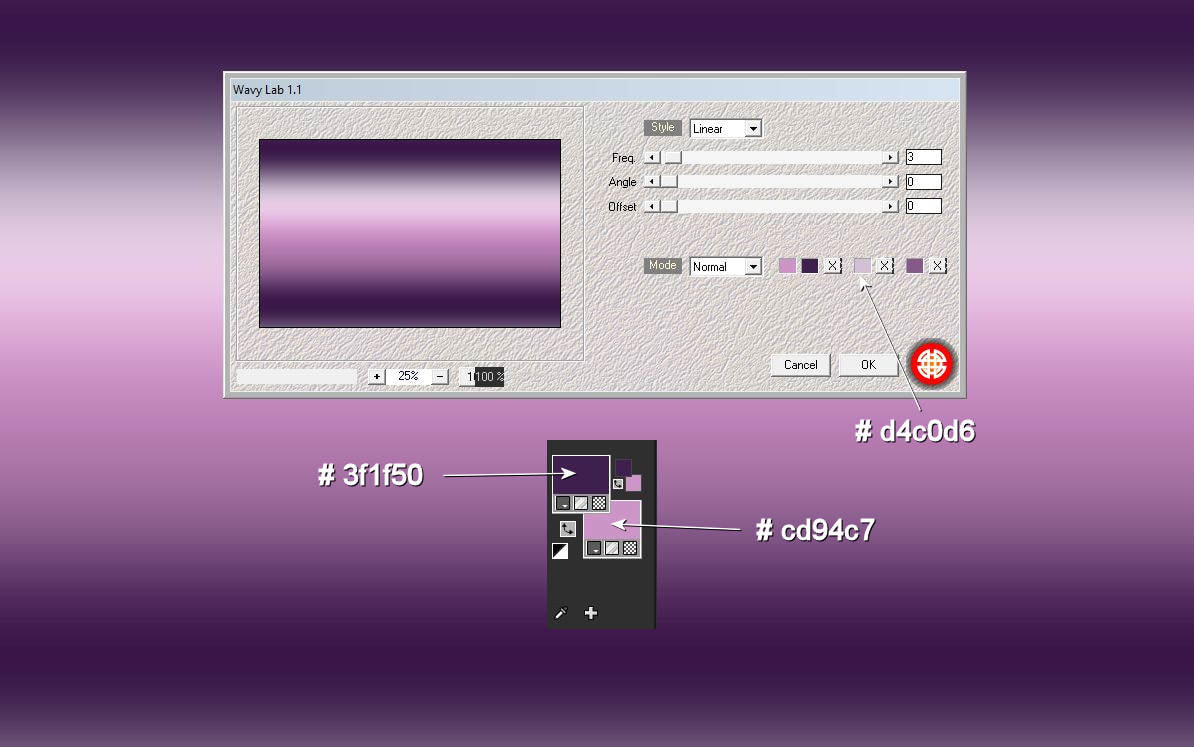
1. Hozz be egy üres lapot és állítsd be a színpalettáidat majd tedd rá ezt a szüröt.
Load in the new transparent background and set up your color palettes.
Effects - Plugins - Mehdi - Wavy Lab
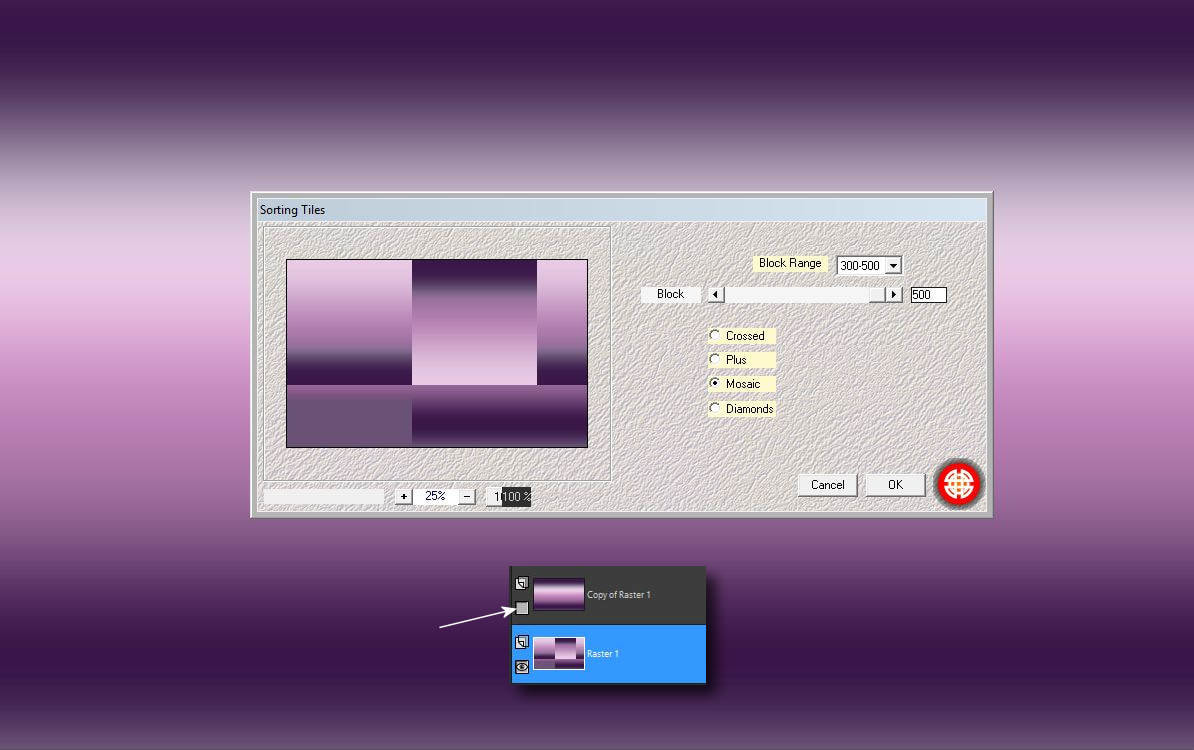
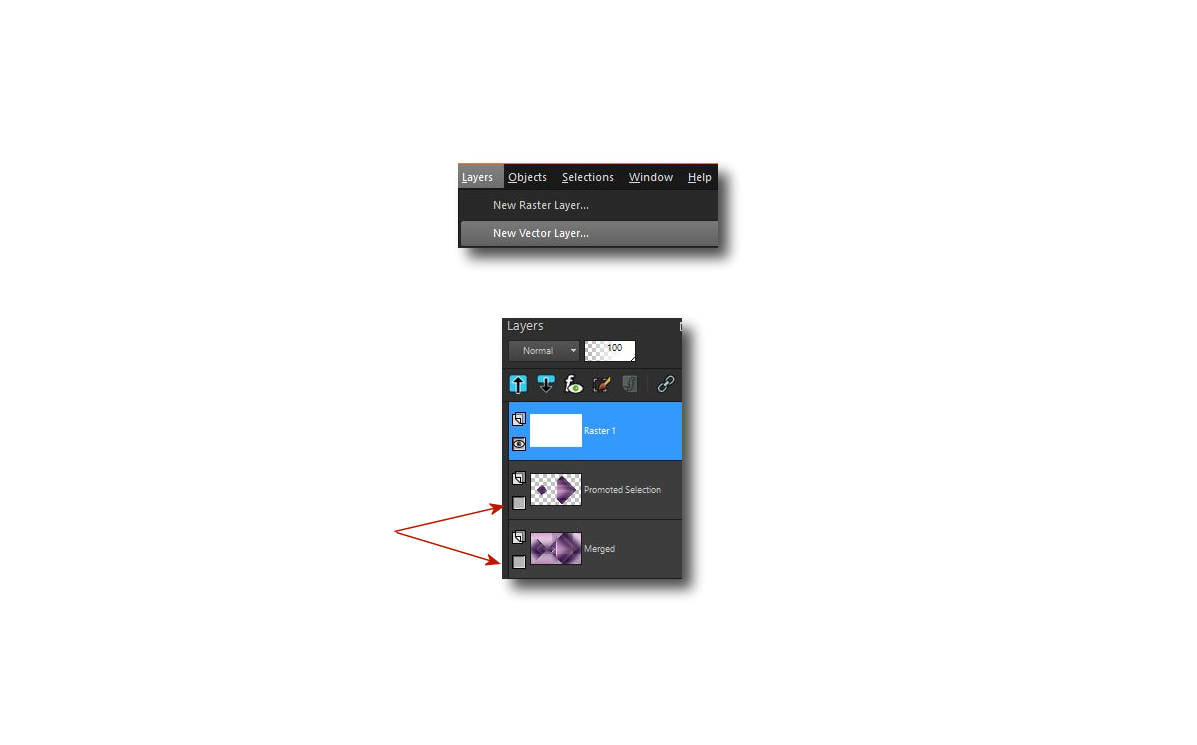
2. Duplázd meg a réteget csukd be a felsö rétegszemet és állj az alsóra.
Tedd rá ezt a szüröt.
Layers duplicate. Close the eyes of top layer. Go to the bottom layer.
Effects - Plugins - Mehdi - Sorting Tiles
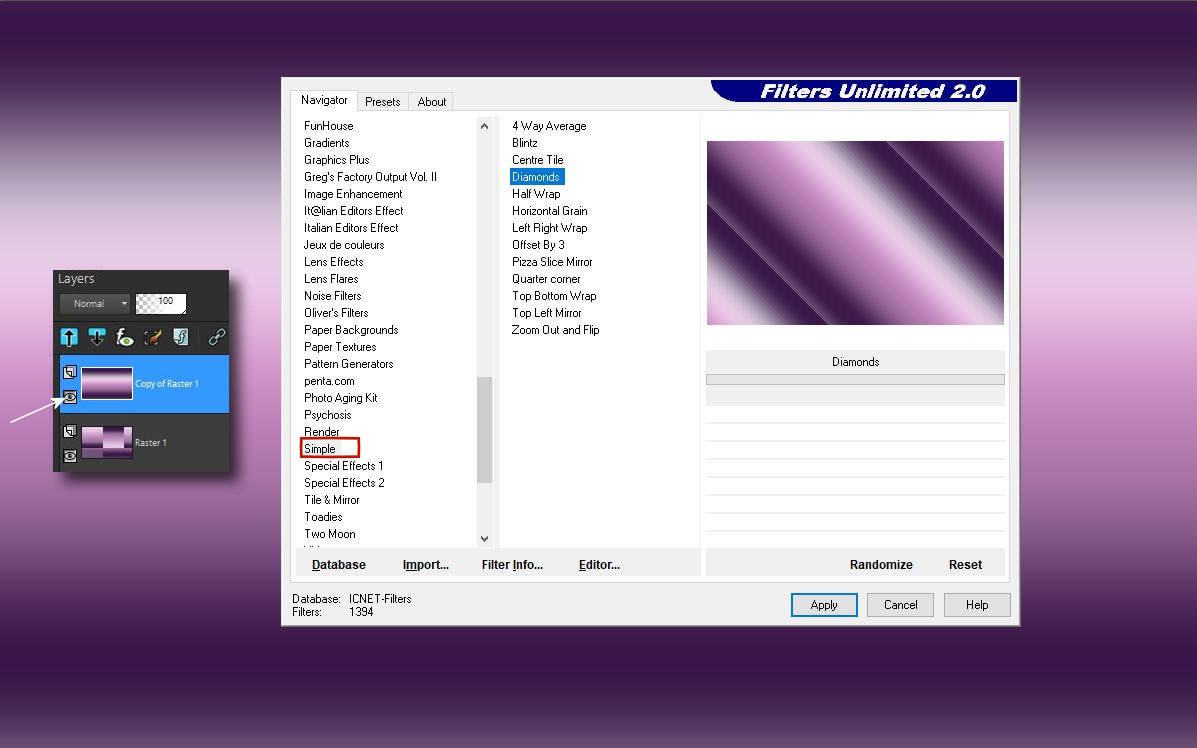
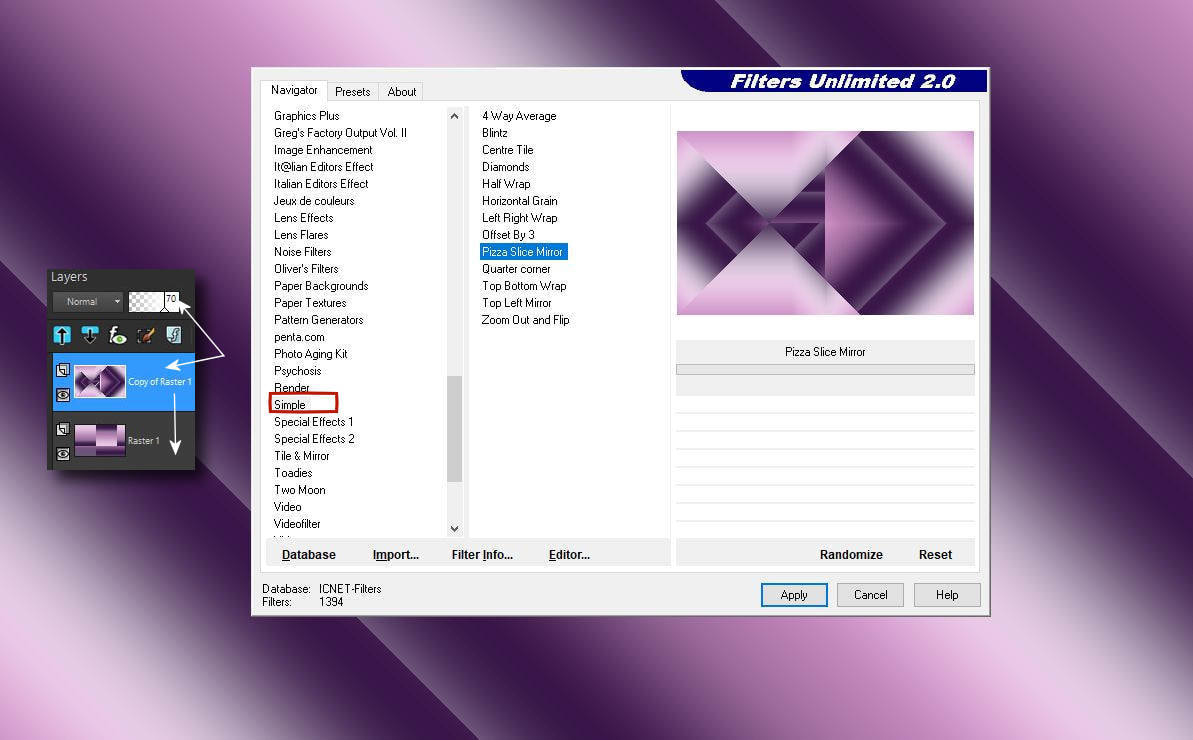
3. Nyisd ki a felsö rétegszemet. Tedd rá ezt a szüröt.
Open the top layer eye.
Effects - Plugins - Filters Unlimited - Simple - Diamonds
4. Azután tedd rá erre a rétegre ezt a szüröt. Tedd a blend modot 50%-a
majd add össze a rétegeket.
Stay on this layer. Plugins - Filters Unlimited - Simple - Pizza Slide Mirror
Blend mode 50%
Layers - Merge visible
5. Effects - Edge Effects - Enhance

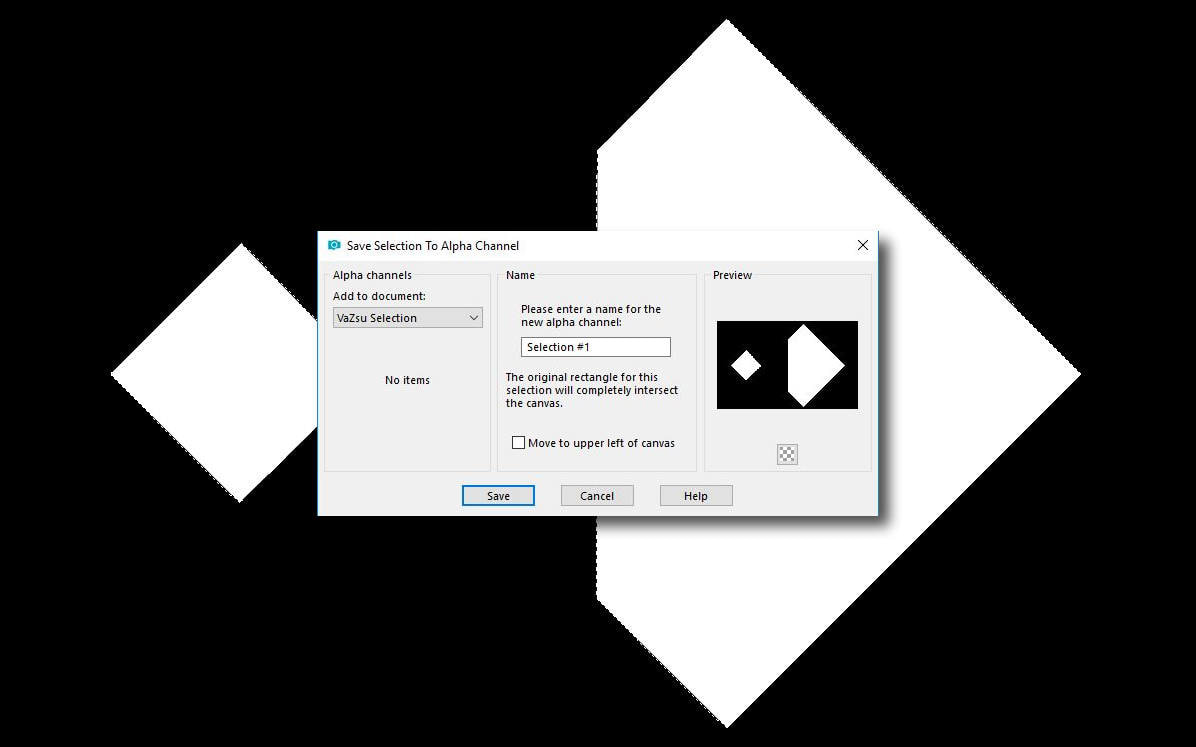
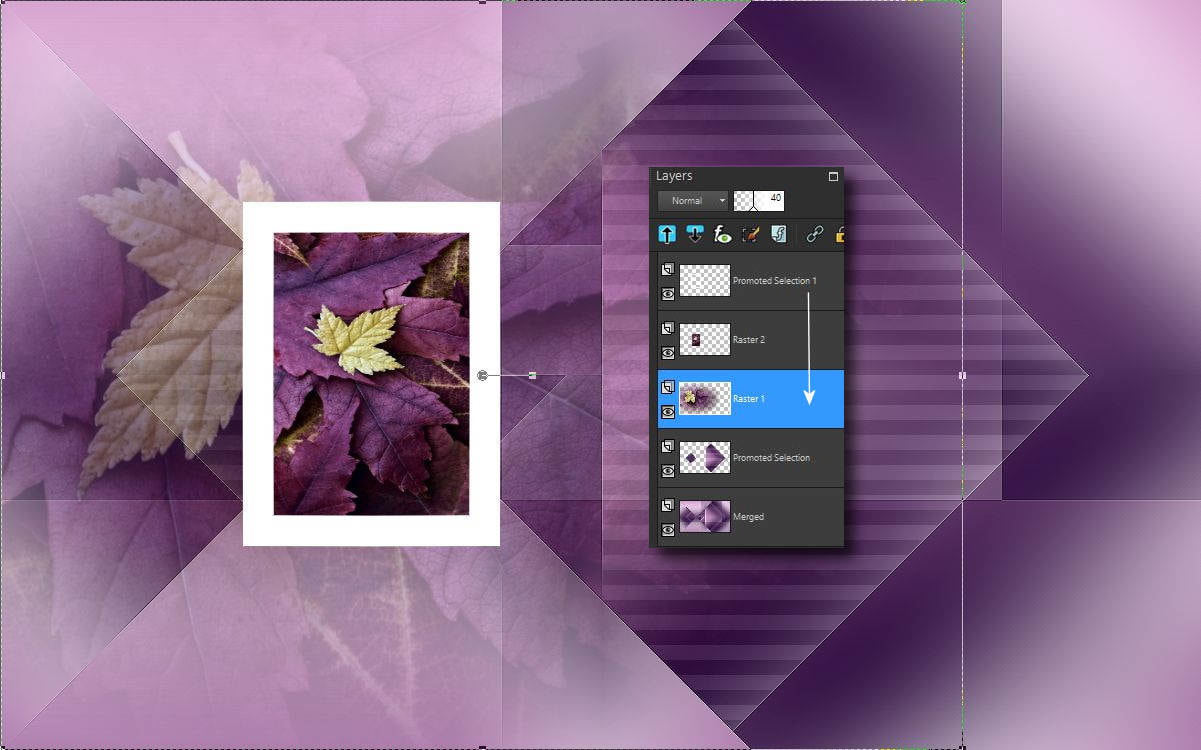
6. Hozd be a VaZsu selectiont a csomagból csináld meg a kijelölést és ments be
az Alpha csatornába.
Load in the VaZsu Selection from your material package.
Save it to the Alpha Channel.
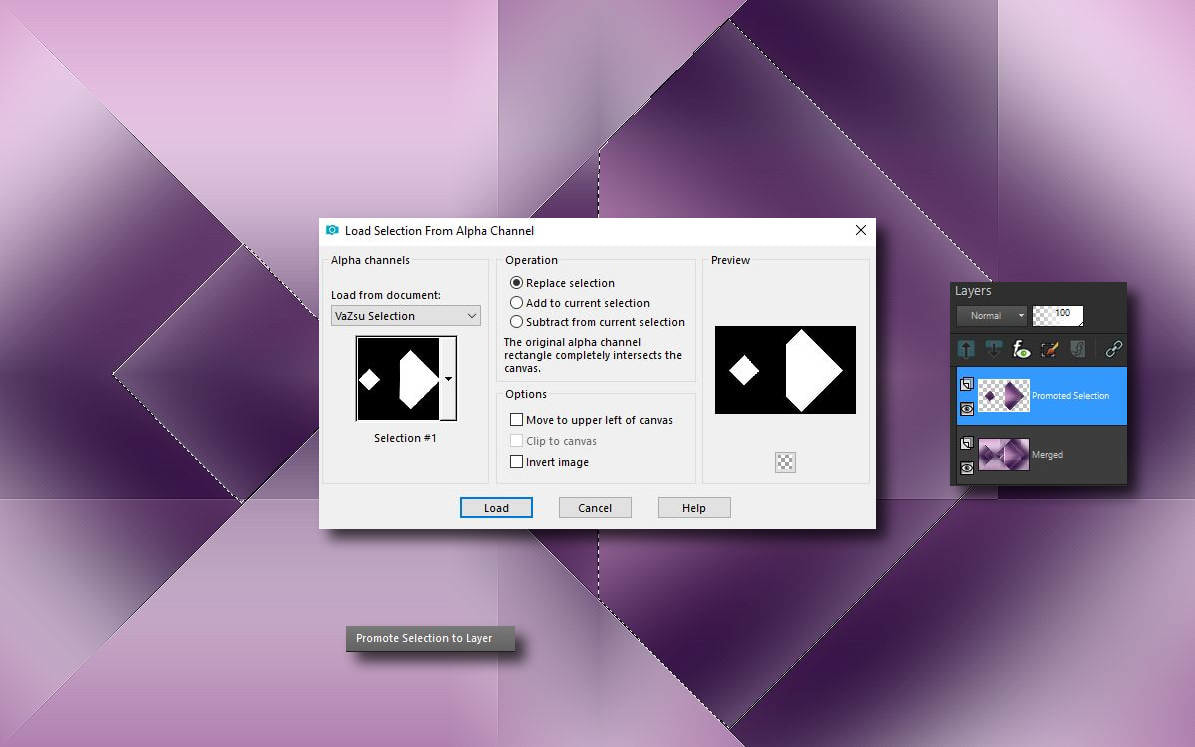
7. Selection - Load Selection from Alpha Channel.
Promote Selection to Layer
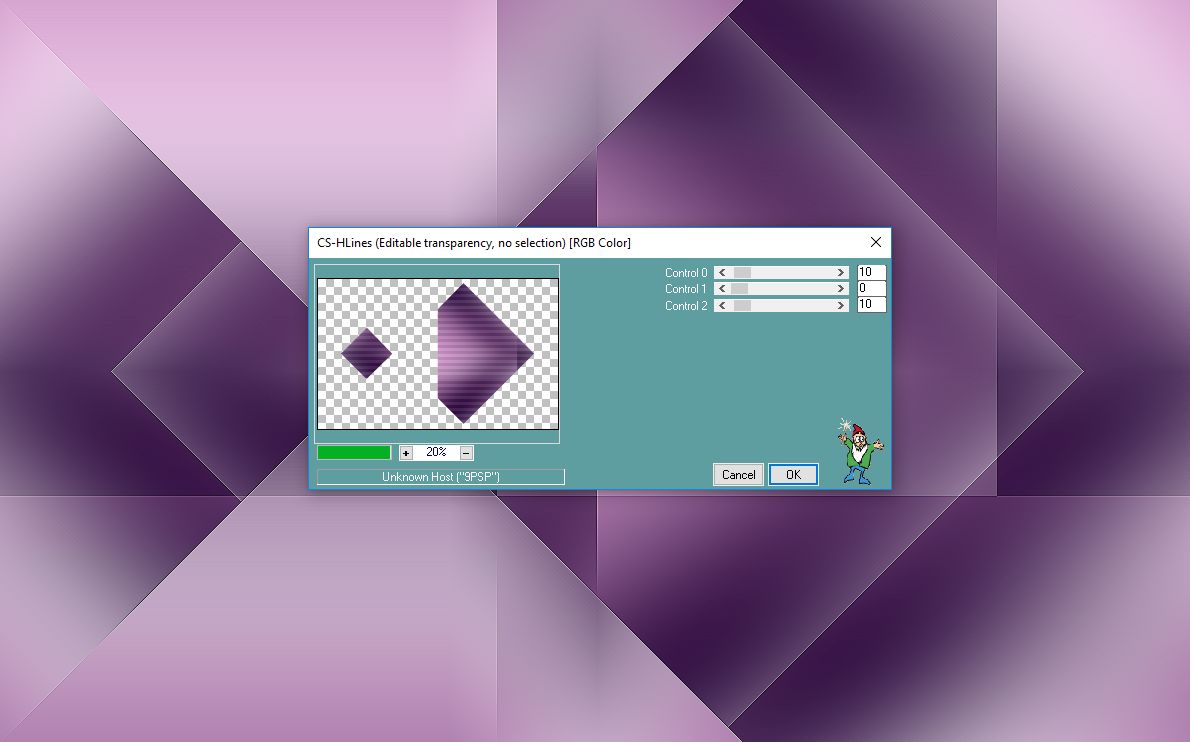
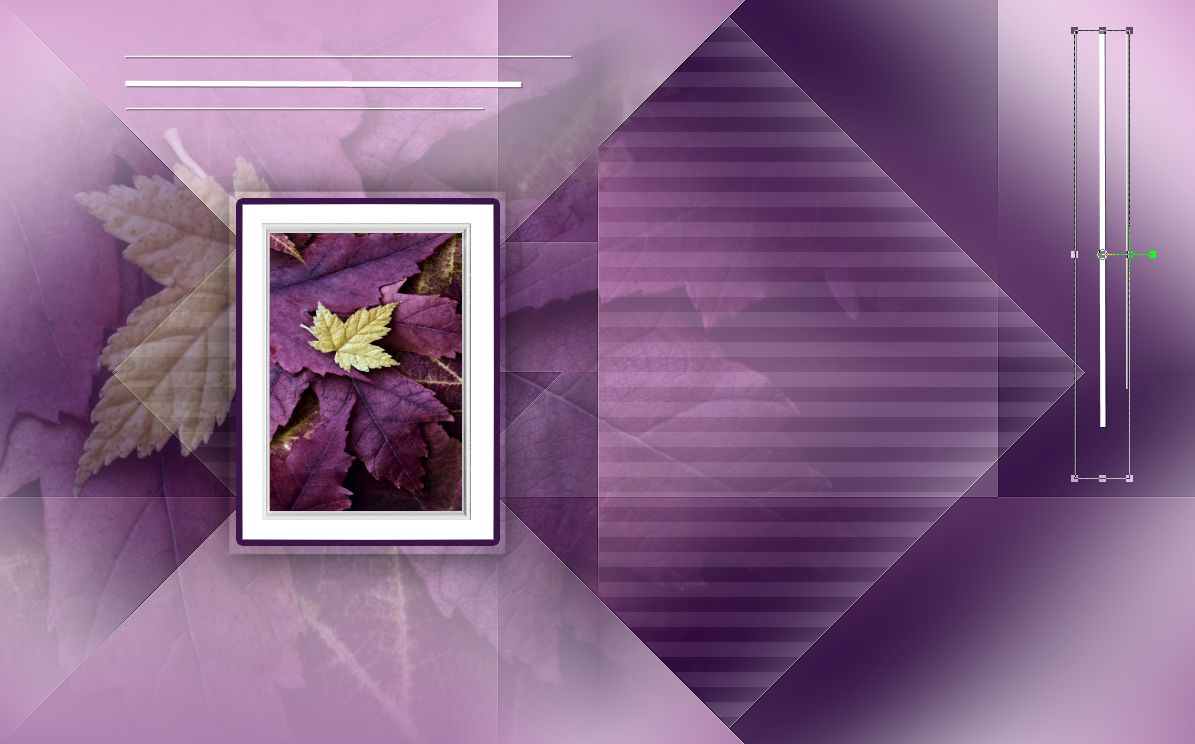
8. Effects - Plugins - Caroline and Sensibility CS - H Lines
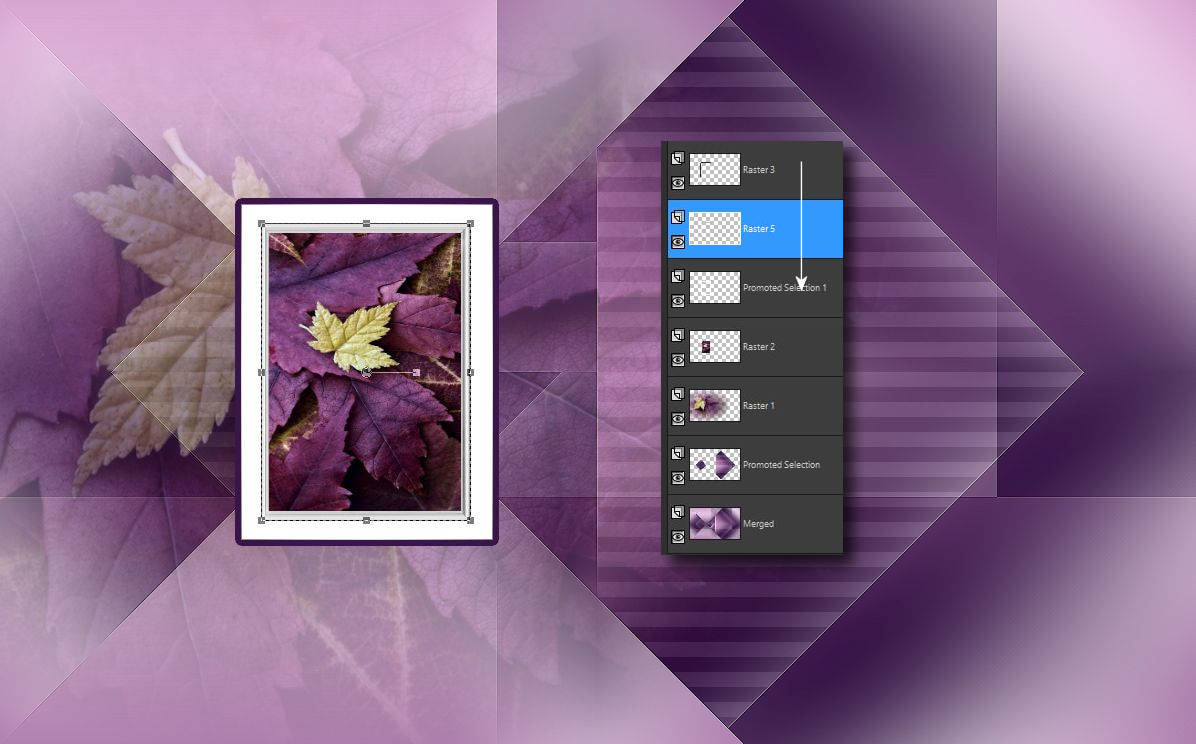
9. Hozz be egy új vector réteget. Csukd be az alsó két rétegszemet és öntsd ki fehér
színnel az új rétegedet.
Layers - New Vector Layers.
Close the eyes of the two bottom layers
Fill up the new layer with white color
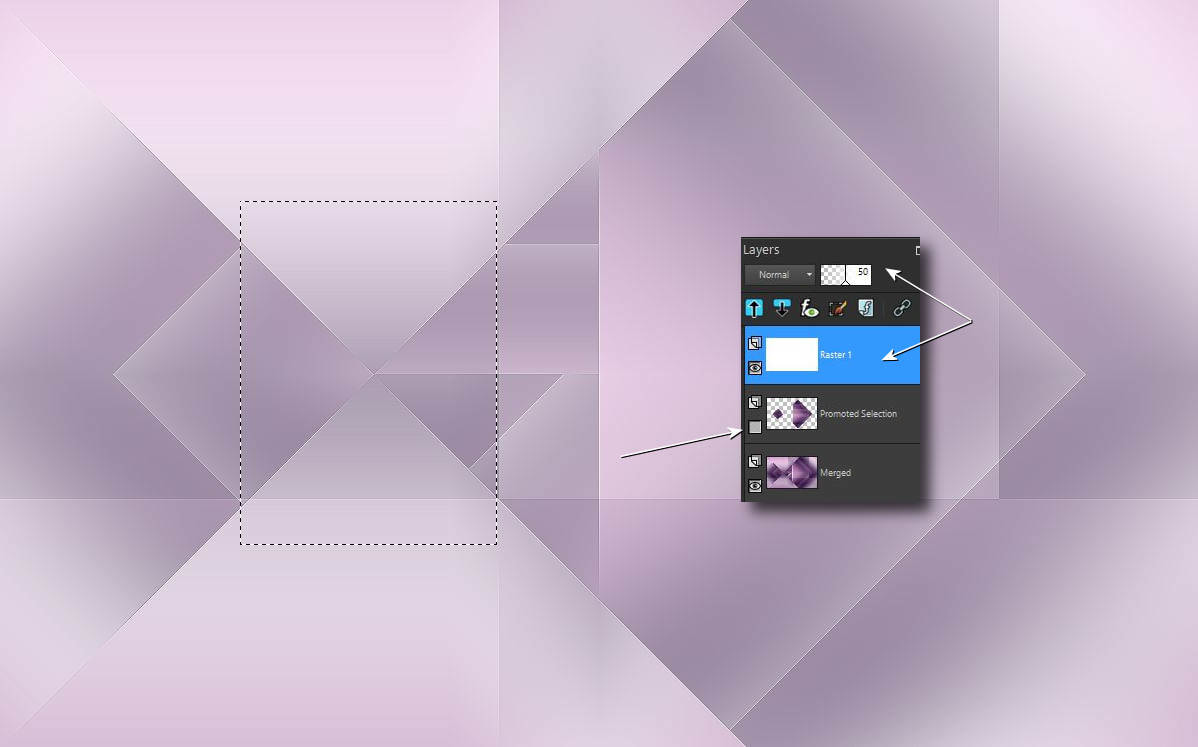
10. Nyisd ki az alsó szemet a fehér réteged blend módját tedd 50%-ra.
Csinálj rajta egy ilyen és kb ekkora kijelölést.
Open the bottom layer eye. The middle one still closed.
The white layer blend mode 50%.
Make a selection like you see here on the demo image
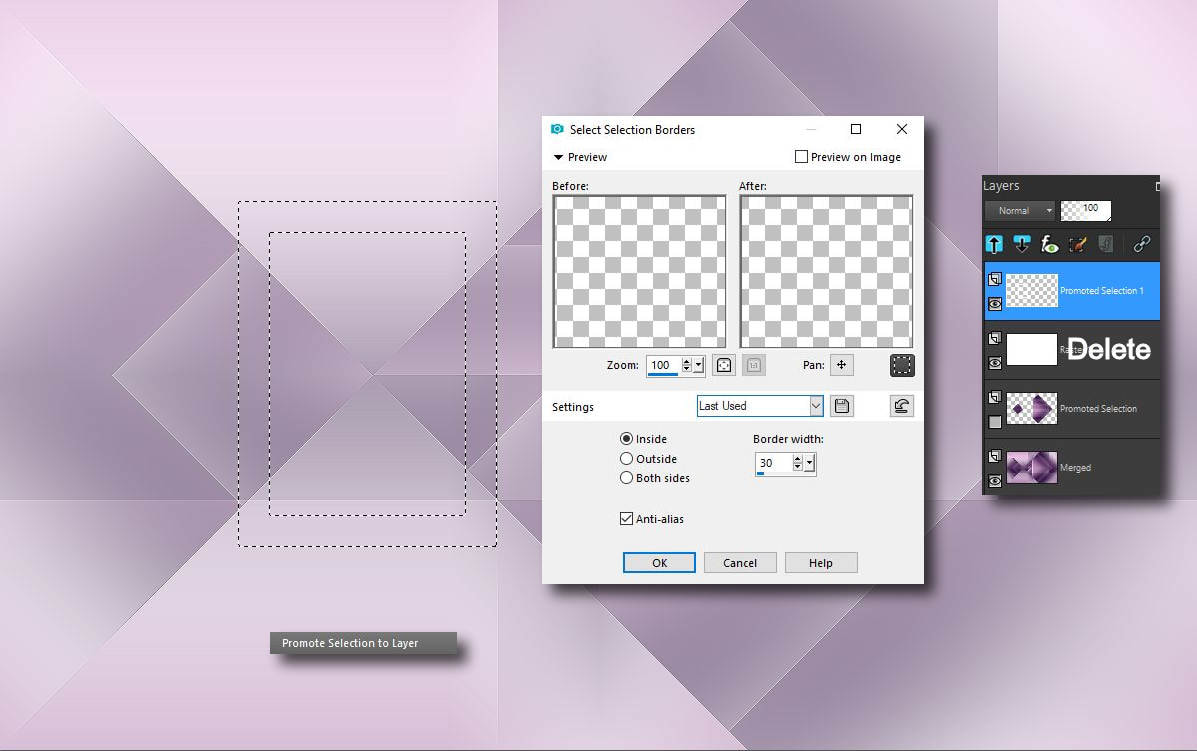
11. Selection - Modify - Select Selection Border 30
Promote Selection to Layer
Delete the white layer
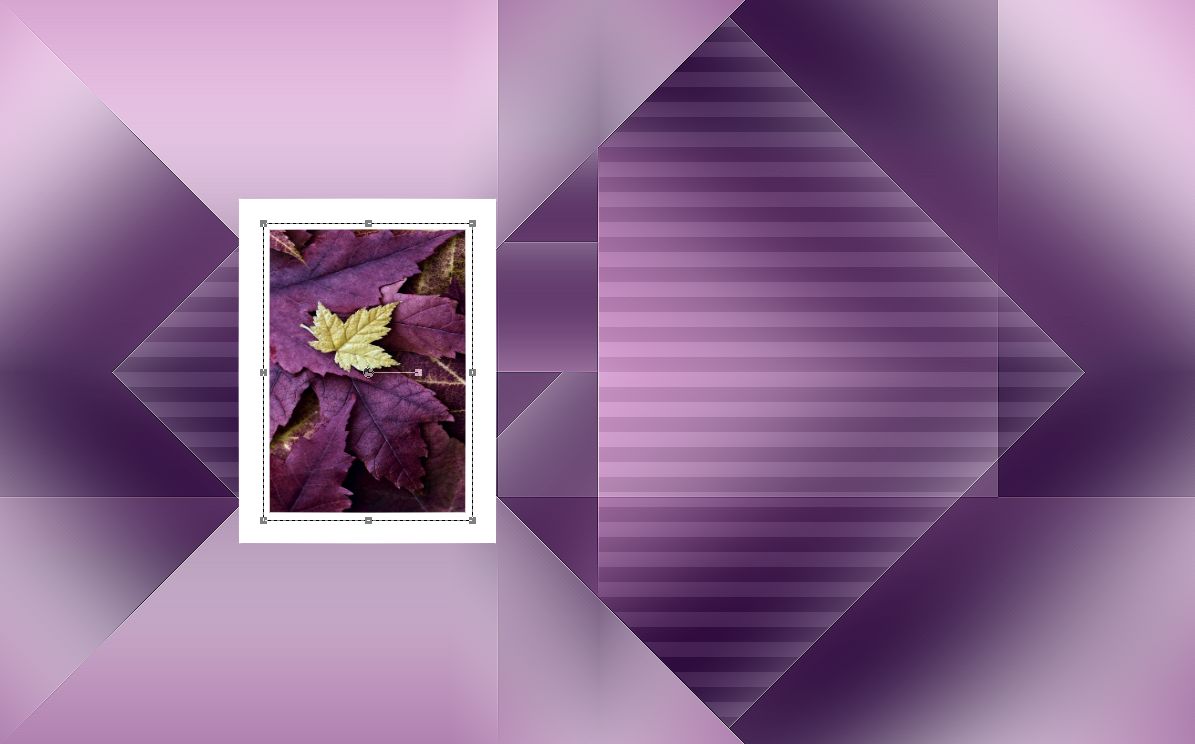
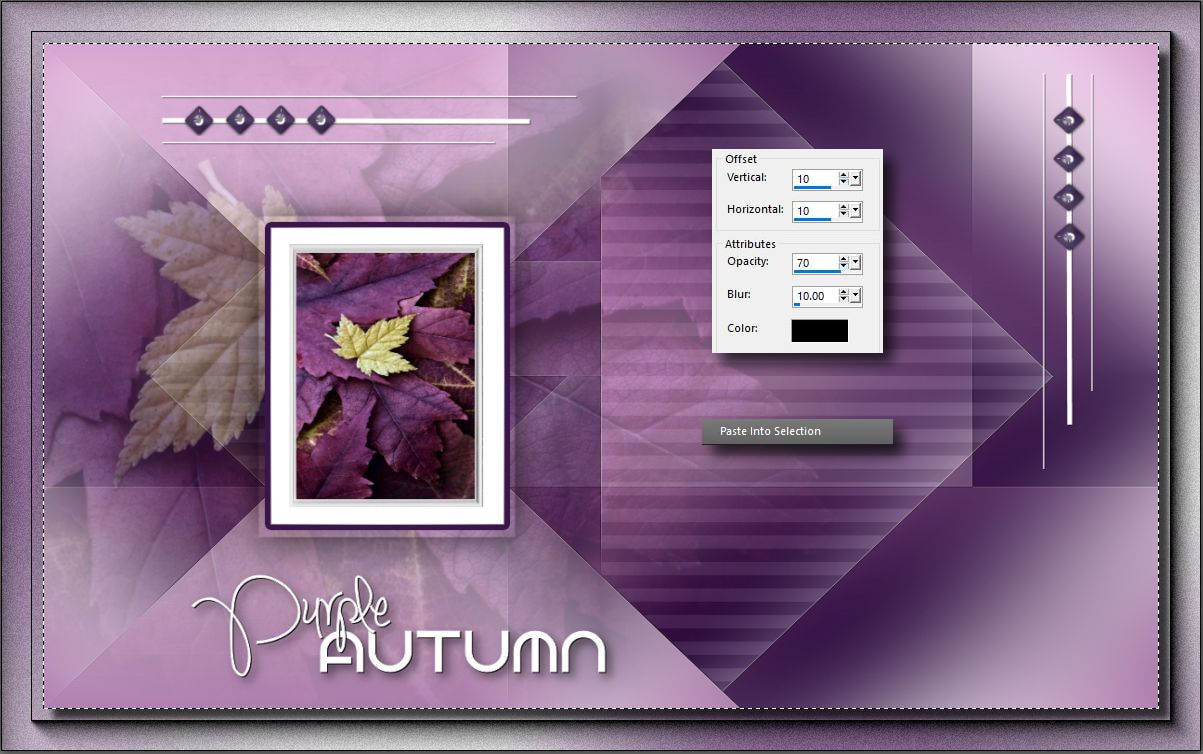
12. Hozd be az öszi képet másold be a képedre és vidd a réteget a keretgéteg alá.
Load in the Autumn picture and paste to your image as a new layer.
Move this layer under the frame layer
13. Most a nagyobb png képet másold be új rétegként és vidd a réteget a keretes
rétegek alá. Tedd a blend modot 40%-ra
Load in the Png Autumn image from the package.
Move the layer like you see here in the demo image.
Blend Mode 40%
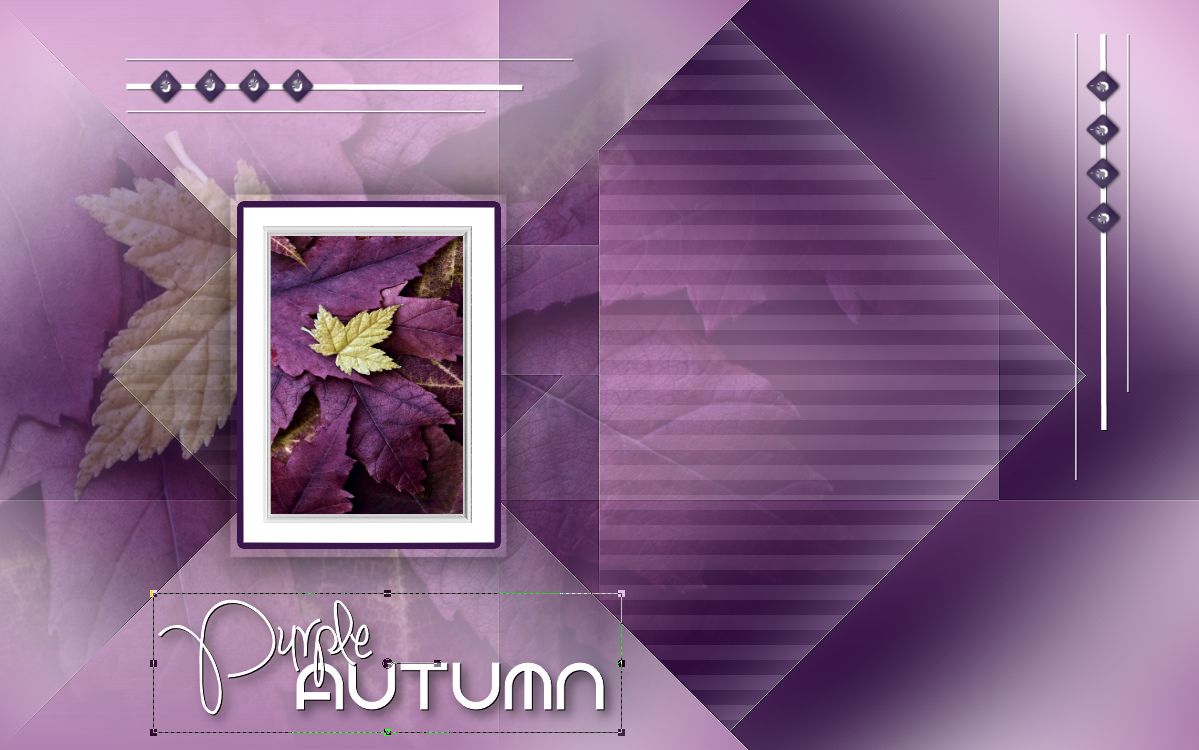
14. Helyezd el a bordó vékony keretet is.
Paste into your image the purple frame as a new layer

15. Helyezd el belülre a vékony fehér keretet is Add össze a felsö három réteget.
Load in the white frame and positioning to the inside of the promoted frame.
Merge down two time.
16. Hozd be az árnyék kereted a csomagból és pozícionáld pontosan a meglévö
kereted fölé.
Load in the shadow frame from your material package.
Do the position correctly!

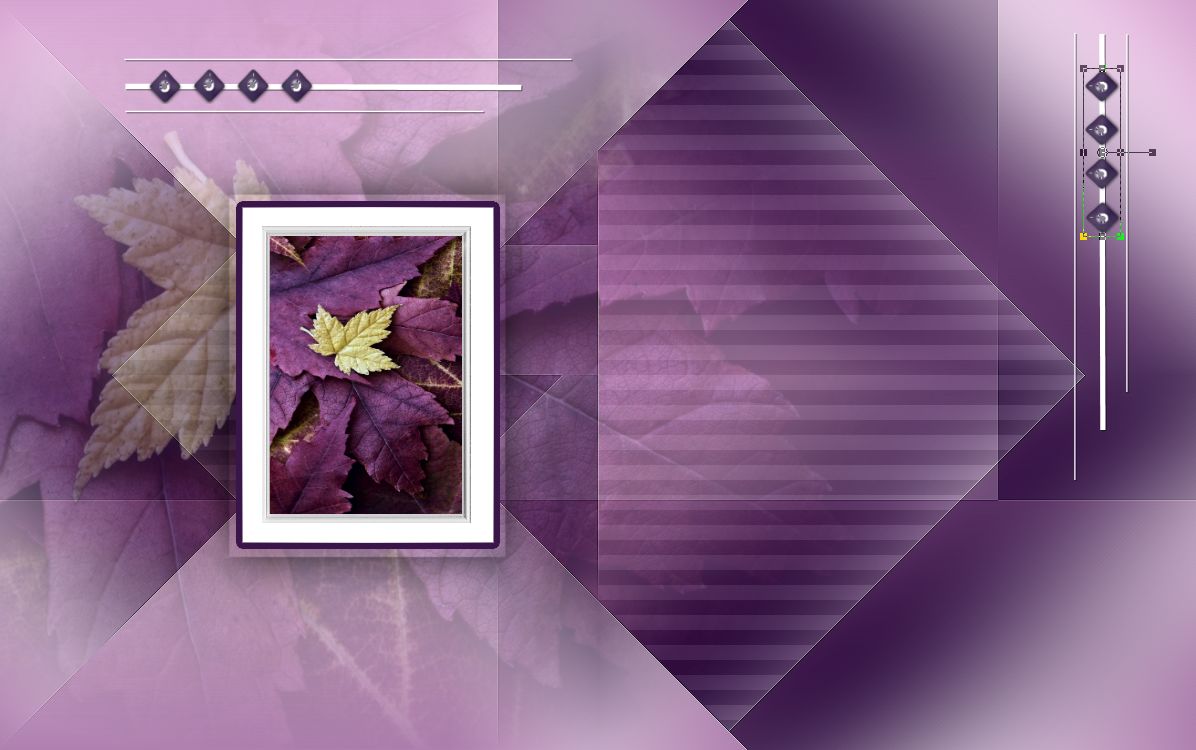
17. Kezdjünk dekorálni. Kövesd a képeken látottakat és pozícionálj pontosan.
Start with the decoration. Just follow what you see on the demo image

18.
19.
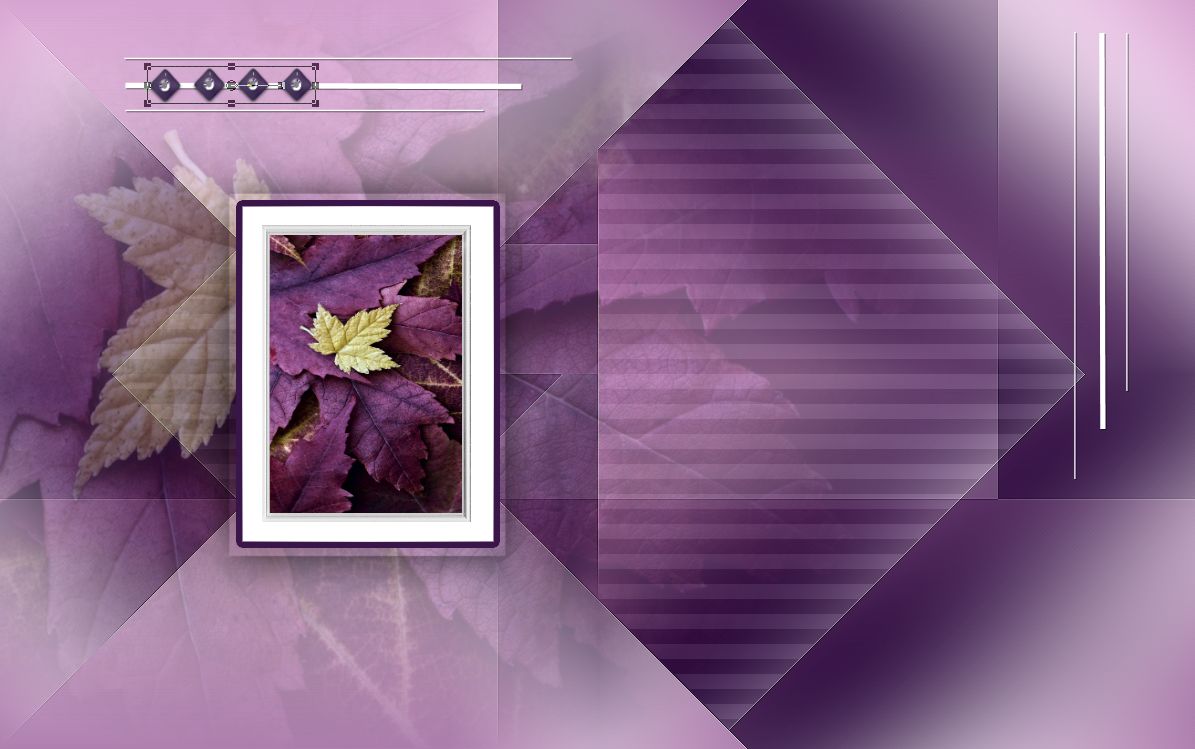
20.
21.
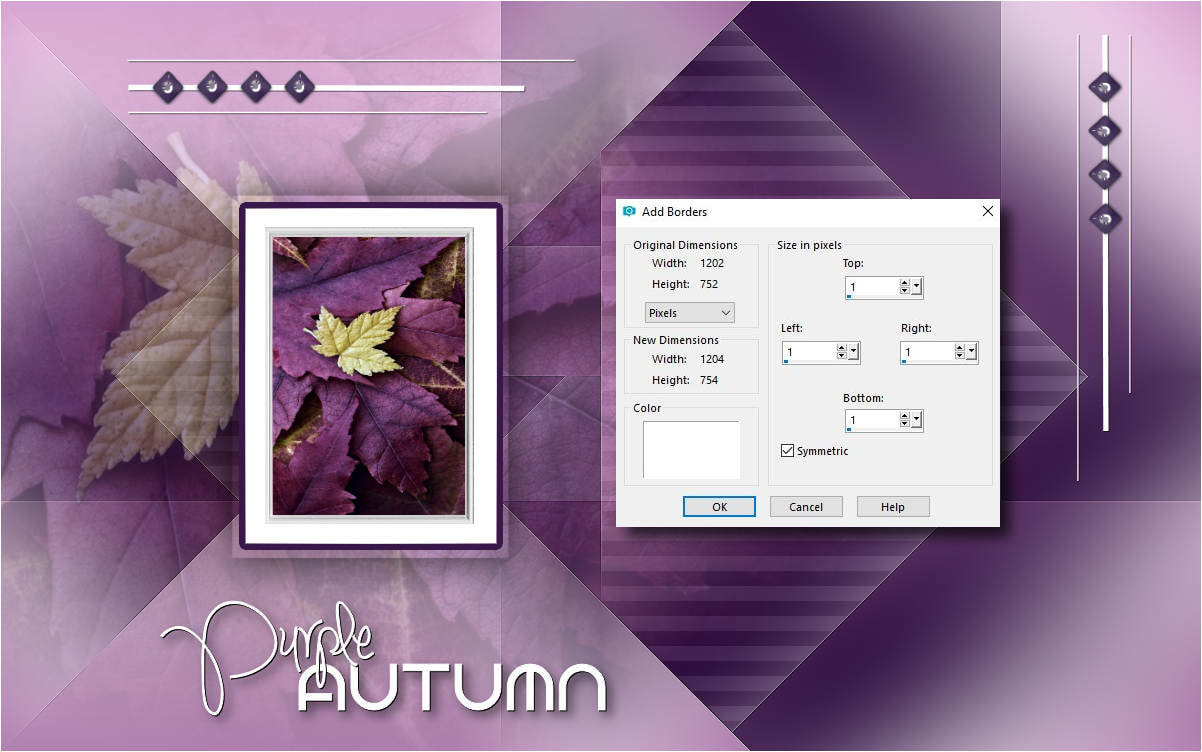
22. Im1age - Add Borders ( color white )
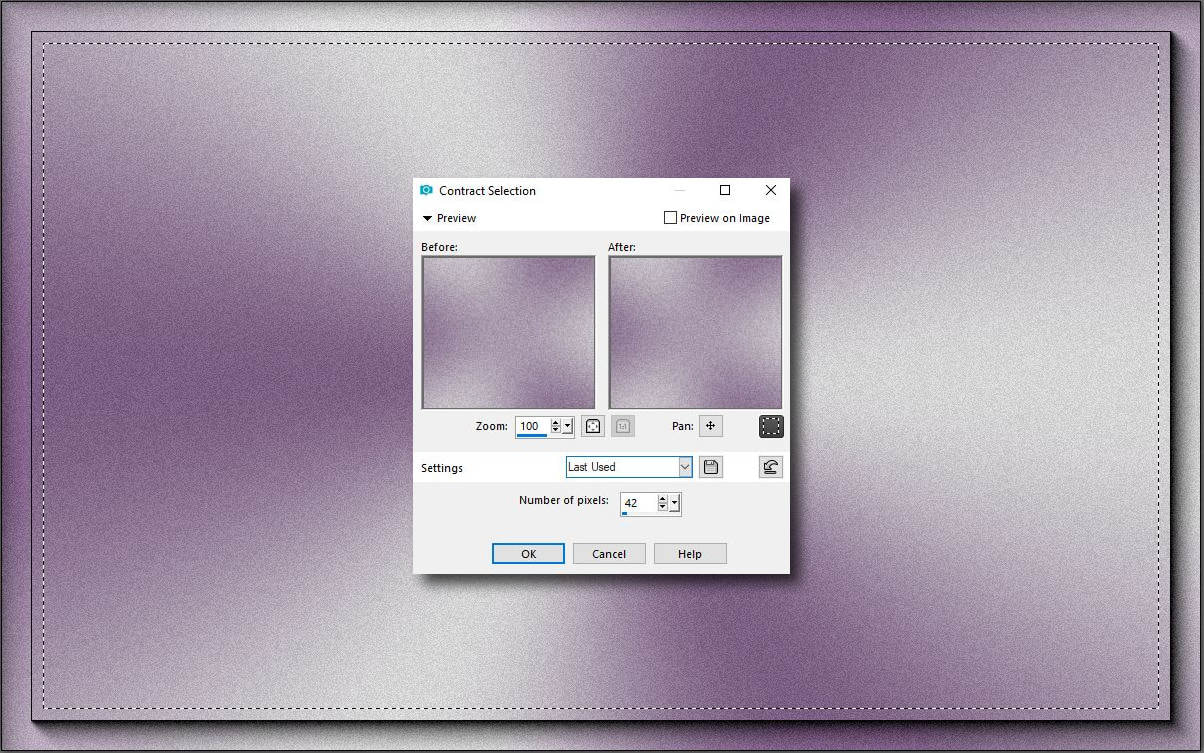
23. Hozd be a base image-t Tedd rá ezt a kijelölést.
Load in the base image.
Selection - Select All
Selection - Modify - Contract 42
24. Másold be a képedet a kijelölésbe adj neki árnyékot és szüntesd meg a
kijelölést.
Paste into the selection your ready image.
Give it a shadow and selection none.
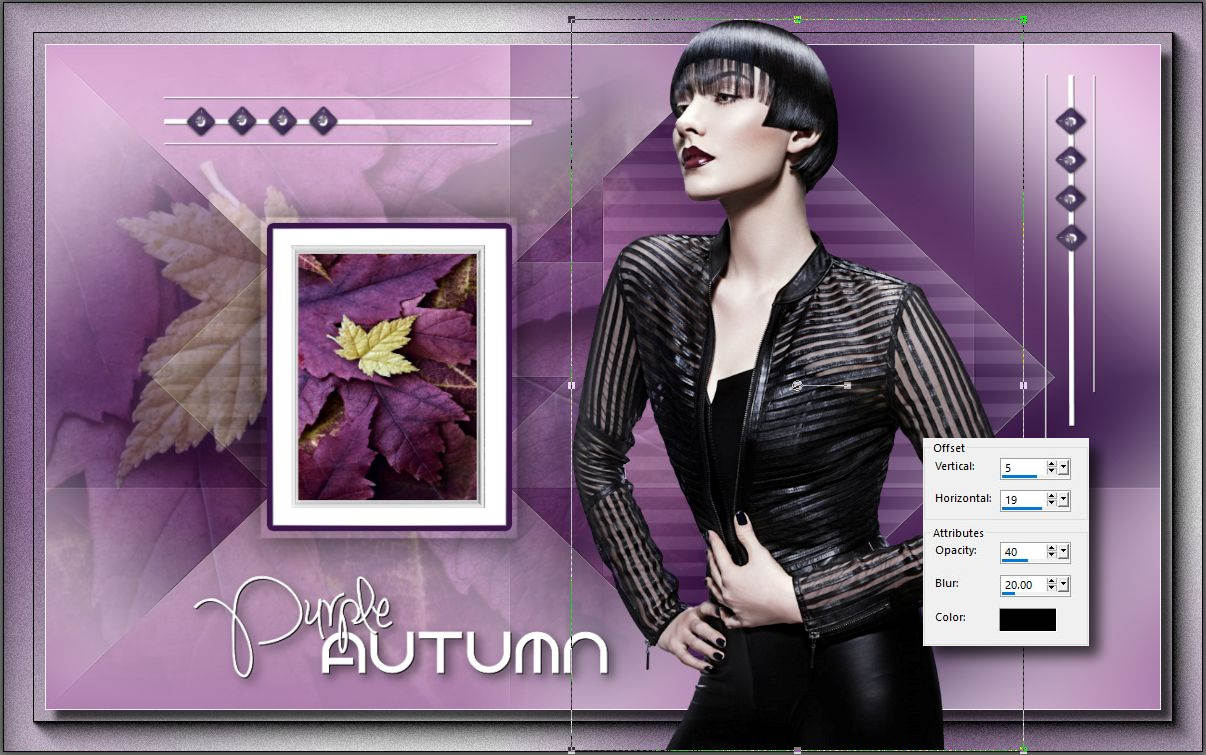
25. Hozd be a nöi tubet helyezd a megfelelö pozícióba és adj neki árnyékot.
Load in the tube do the position and give it a shadow.
Gratulálok már készen is vagy. Remélem hamarosan látlak ismét.
Congrats you're done! I hope I will see you soon again.