VaZsu PSP Tutorials
  • Home
  • Looking Back
  • Tutorials 5
    • TUTORIALS 231 - 240 >
      • VaZsu Tutorial 231
      • VaZsu Tutorial 232
      • VaZsu Tutorial 233
      • VaZsu Tutorial 234
      • VaZsu Tutorial 235
      • VaZsu Tutorial 236
      • VaZsu Tutorial 237
      • VaZsu Tutorial 238
      • VaZsu Tutorial 239
      • VaZsu Tutorial 240
    • Tutorials 241 - 250 >
      • VaZsu Tutorial 241
      • VaZsu Tutorial 242
      • VaZsu tutorial 243
      • VaZsu Tutorial 244
      • VaZsu Tutorial 245
      • VaZsu Tutorial 246
      • VaZsu Tutorial 247
      • VaZsu Tutorial 248
      • VaZsu Tutorial 249
      • VaZsu Tutorial 250
    • Tutorials 251 - 260 >
      • VaZsu Tutorial 251
      • VaZsu Tutorial 252
      • VaZsu Tutorial 253
      • VaZsu Tutorial 254
      • VaZsu Tutorial 255
      • VaZsu Tutorial 256
      • VaZsu Tutorial 257
      • VaZsu Tutorial 258
      • VaZsu Tutorial 259
      • VaZsu Tutorial 260
    • Tutorials 261 - 265 >
      • VaZsu Tutorial 261
      • VaZsu Tutorial 262
      • VaZsu Tutorial 263
      • VaZsu Tutorial 264
      • VaZsu Tutorial 265
  • Pastel Style Tutorials
    • Tutorials 266 - 270 >
      • VaZsu Tutorial 266
      • VaZsu Tutorial 267
      • VaZsu Tutorial 268
      • VaZsu Tutorial 269
      • VaZsu Tutorial 270
    • Tutorials 271 -280 >
      • VaZsu Tutorial 271
      • VaZsu Tutorial 272
      • VaZsu Tutorial 273
      • VaZsu Tutorial 274
      • VaZsu Tutorial 275
      • VaZsu Tutorial 276
      • VaZsu Tutorial 277
      • VaZsu Tutorial 278
      • VaZsu Tutorial 279
      • VaZsu Tutorial 280
    • Tutorials 281 - 290 >
      • VaZsu Tutorial 281
      • VaZsu Tutorial 282
      • VaZsu Tutorial 283
      • VaZsu Tutorial 284
      • VaZsu Tutorial 285
      • VaZsu Tutorial 286
      • VaZsu Tutorial 287
      • VaZsu Tutorial 288
      • VaZsu Tutorial 289
      • VaZsu Tutorial 290
    • Tutorials 291 - 300 >
      • VaZsu Tutorial 291
      • VaZsu Tutorial 292
      • VaZsu Tutorial 293
      • VaZsu Tutorial 294
      • VaZsu Tutorial 295
      • VaZsu Tutorial 296
      • VaZsu Tutorial 297
      • VaZsu Tutorial 298
      • VaZsu Tutorial 299
      • VaZsu Tutorial 300
    • Tutorials 301 - 400 >
      • VaZsu Tutorial 301
      • VaZsu Tutorial 302
      • VaZsu Tutorial 303
      • VaZsu Tutorial 304
  • Bouquet Editing
    • VaZsu Bouquets
    • Bouquet Tutorials 1. >
      • Whisper About Fall
      • Sweet Things
      • Romantic Bouquet
      • Burgundy Beauty
      • Precious Moments
      • Lovely Vintage
      • Autumn Feeling
      • Tender Memory
      • Grey Miracle
      • My Darling
    • Bouquet Tutorials 2. >
      • Ghotic Feeling
      • Timeless Memory
      • Little Garden
      • Moments In Time
      • Colorful Love
      • Bouquet For My Love
      • Green Valentine's
      • Sunflowers and Irises
      • Artificial Beauty
      • Magnolias For My Love
  • SINEDOT ARTS
    • Before Starts With Sinedots
    • Mi mit jelent
    • VaZsu Sinedot Tutorials >
      • Sinedot Tutorial 1
      • Sinedot Tutorial 2
      • Sinedot Tutorial 3
      • Sinedot Tutorial 4
      • Sinedot Tutorial 5
      • Sinedot Tutorial 6
      • Sinedot Tutorial 7
  • Treasures to Pastell Images
    • PNG Flowers Images
    • Exclusive Png Roses
    • Pastel blurry backgrounds
    • Watercolor painted png flowers
    • VaZsu Wild Flowers Masks
    • Dry Flowers I. PNG
    • Dry Flowers II. PNG
    • Dry Plants PNG
  • Editorial Practices
    • Make a Selection Tool
    • Creative Button 1
    • Creative Button 2
  • VaZsu Videos
    • Karácsonyi Rege

Picture

Picture

Ennek a bemutatónak az érdekessége az, hogy hogyan is lehet egy képkészítési folyamatba berakva keretet csinálni. A lényege az, hogy nem egy külön lapon készítjük el és mintegy alkotó dekor elemként használjuk, hanem pontosan oda és akkora méretben készül amekkorát a képed megkíván magában a szerkesztési foilyamatban.

Picture
t_233_pack.rar
File Size: 5187 kb
File Type: rar
Download File

​Special thanks for my friends for translate this tutorial to French and Dutch language.

Picture
Translate

Violette

Picture
Translate

MoonLightAngel
​   Lisette


Picture

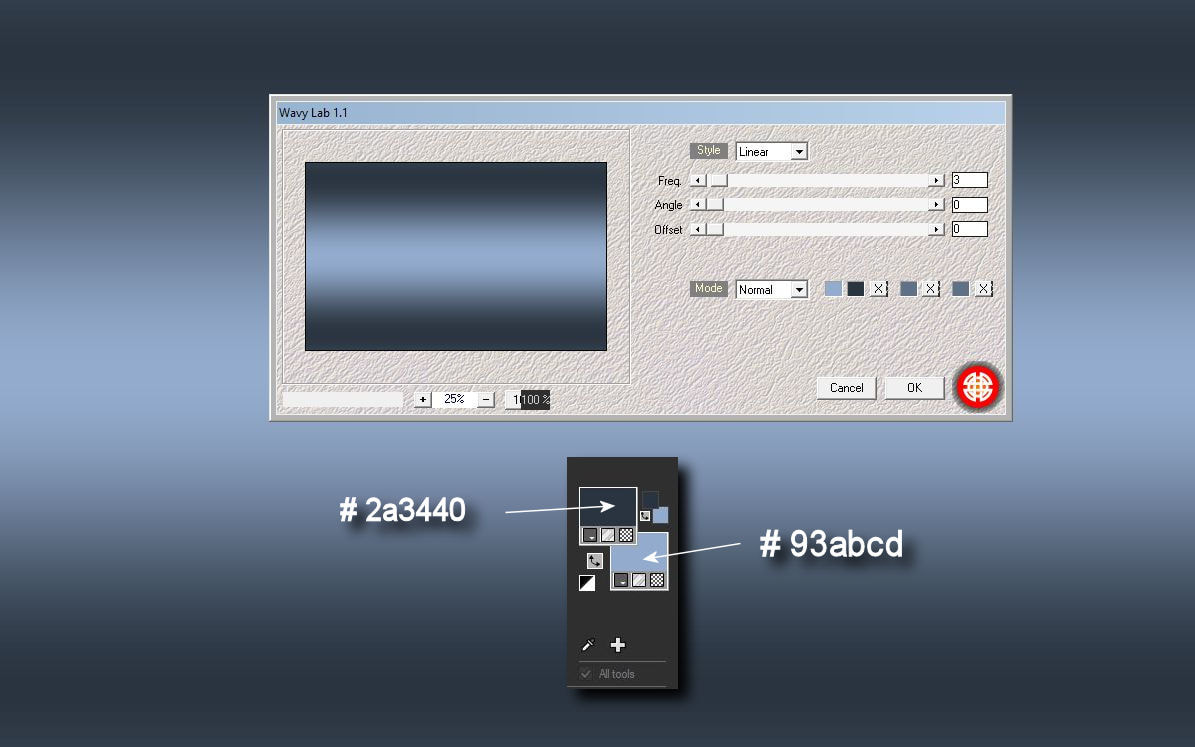
1. Hozz be egy üres lapot állítsd be a színpalettáidat és tedd rá ezt a szüröt.

   Load in the new transparent background. Set up your color palettes.
​   Effects - Plugins - Mehdi - Wavy Lab

Picture

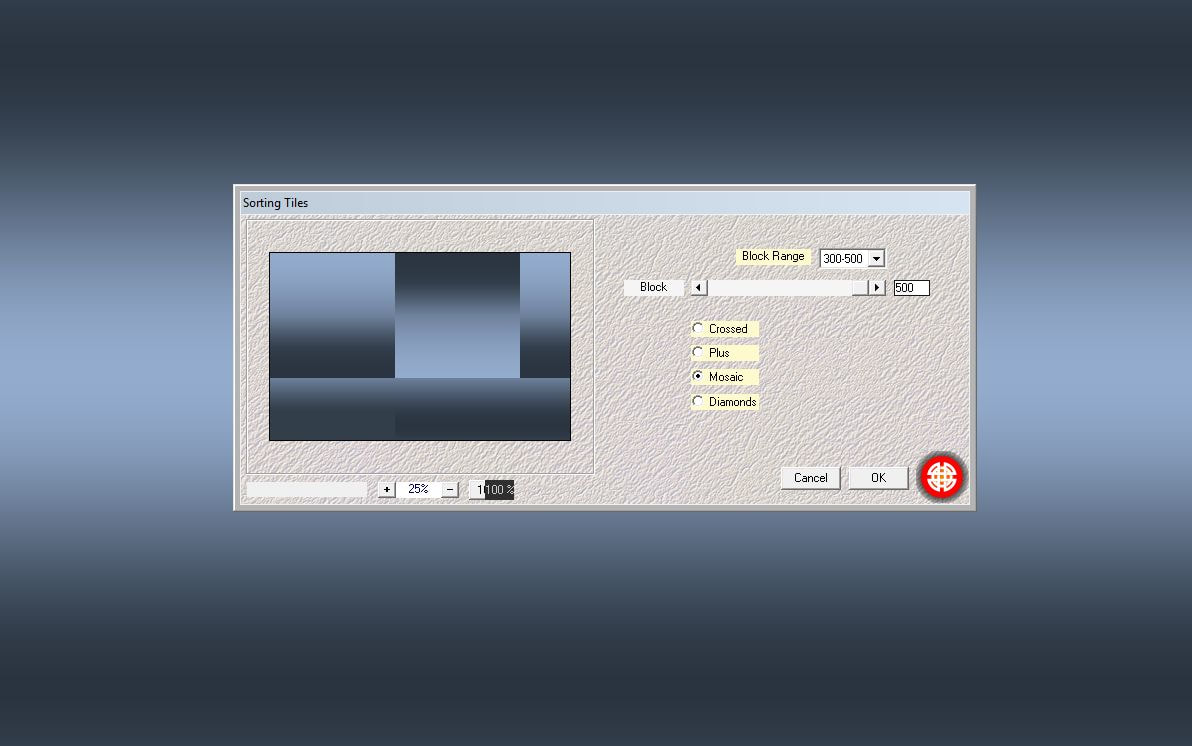
2. Effects - Plugins - Mehdi - Sorting Tiles

Picture

3. Effects - Plugins - Simple - Quick Tiles

Picture

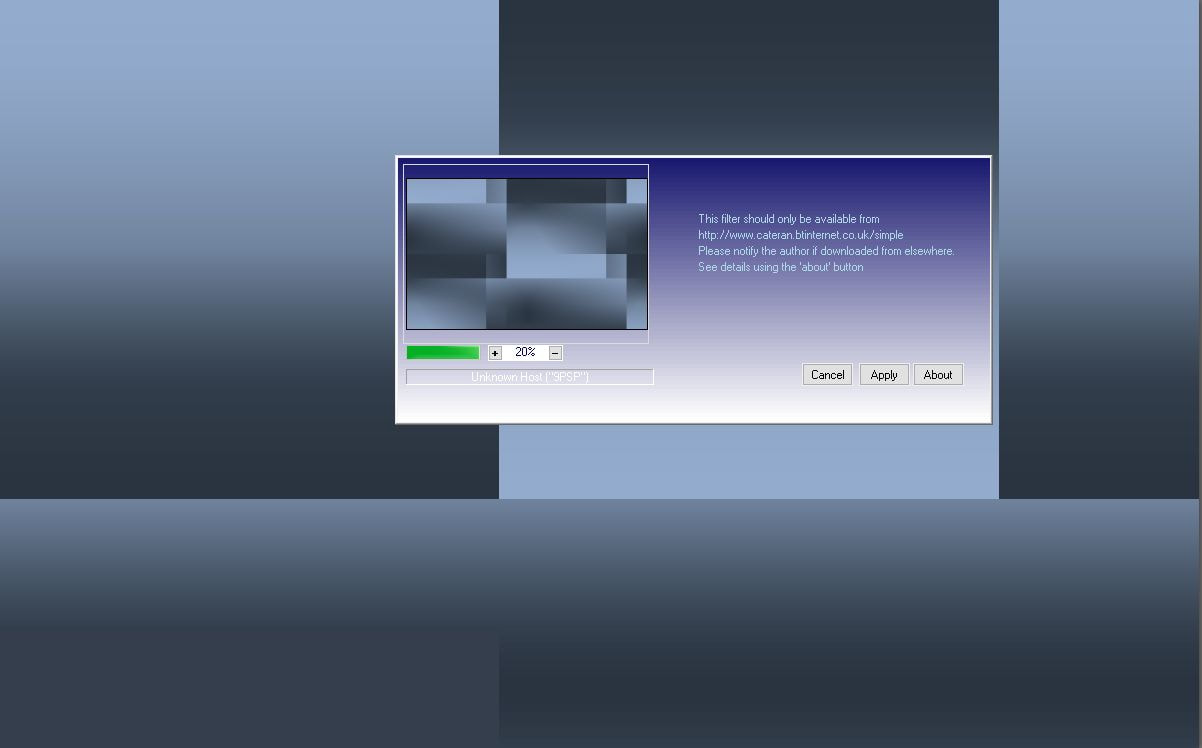
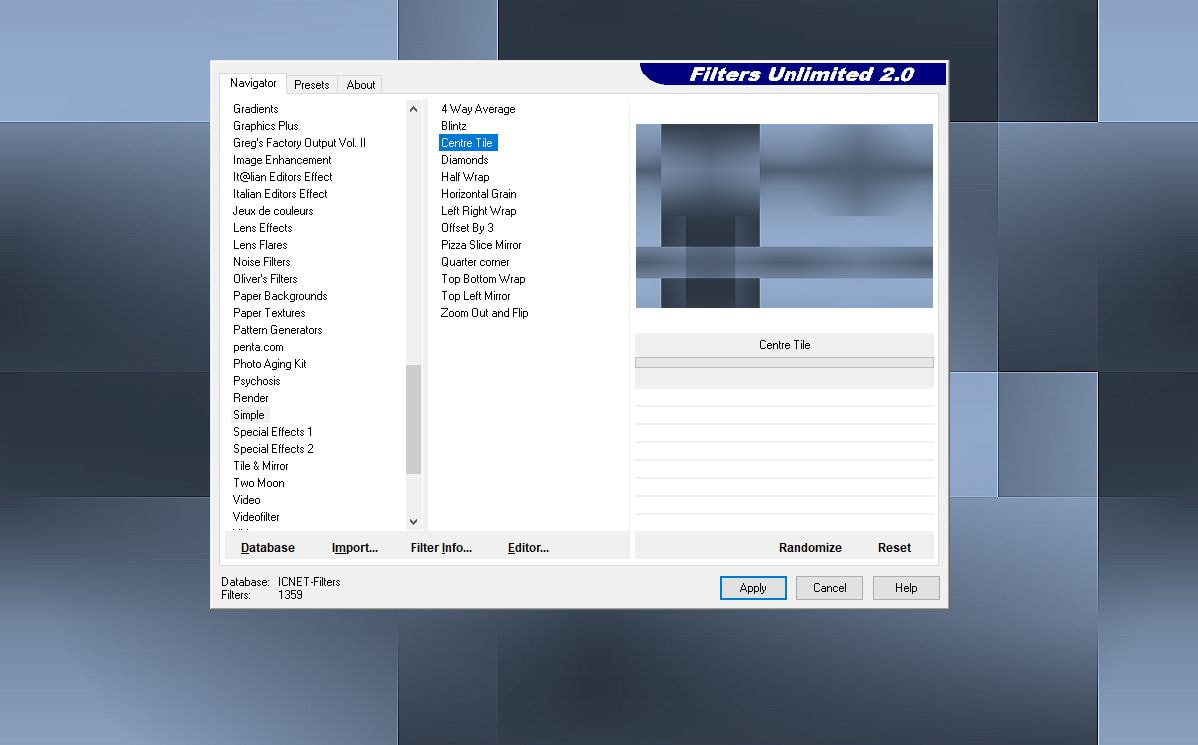
4. Effects - Plugins - Filters Unlimited - Simple - Centre Tile

Picture

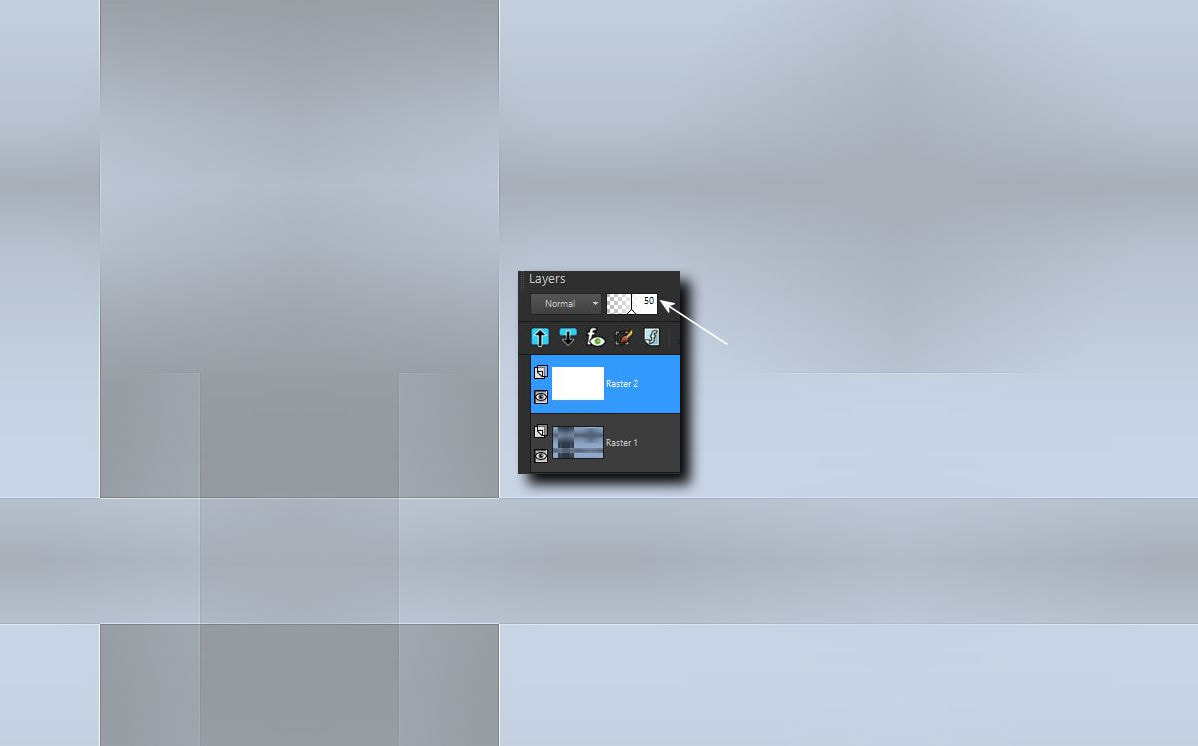
5. Hozz be egy új raster réteget. Csukd be az alsó rétegszemet. Öntsd ki fehér
   színnel az új rétegedet és tedd a blend módját 50%-ra. Majd nyisd ki az also 
   rétegszemet.

   Layers - New raster layer.
   Close the eye of bottom layer.
   Fill Up your new layer with white color and put the blend mode to 50%.
  
Then open the eye of bottom layer.

Picture

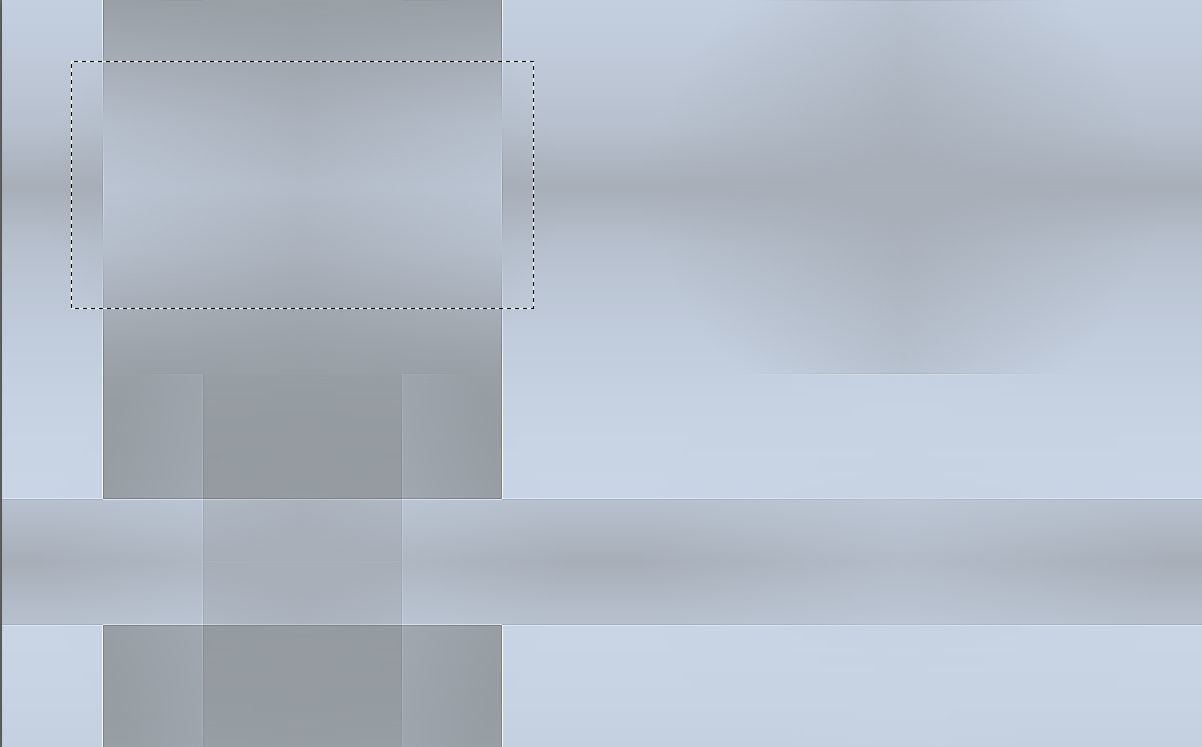
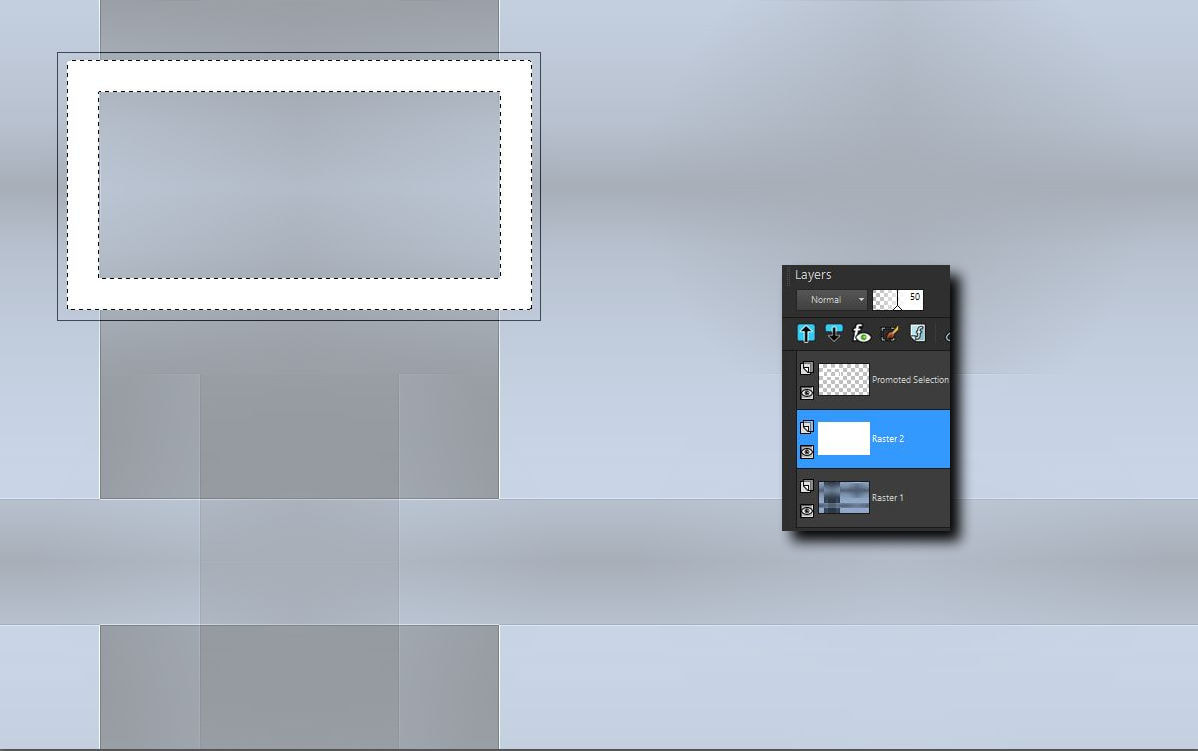
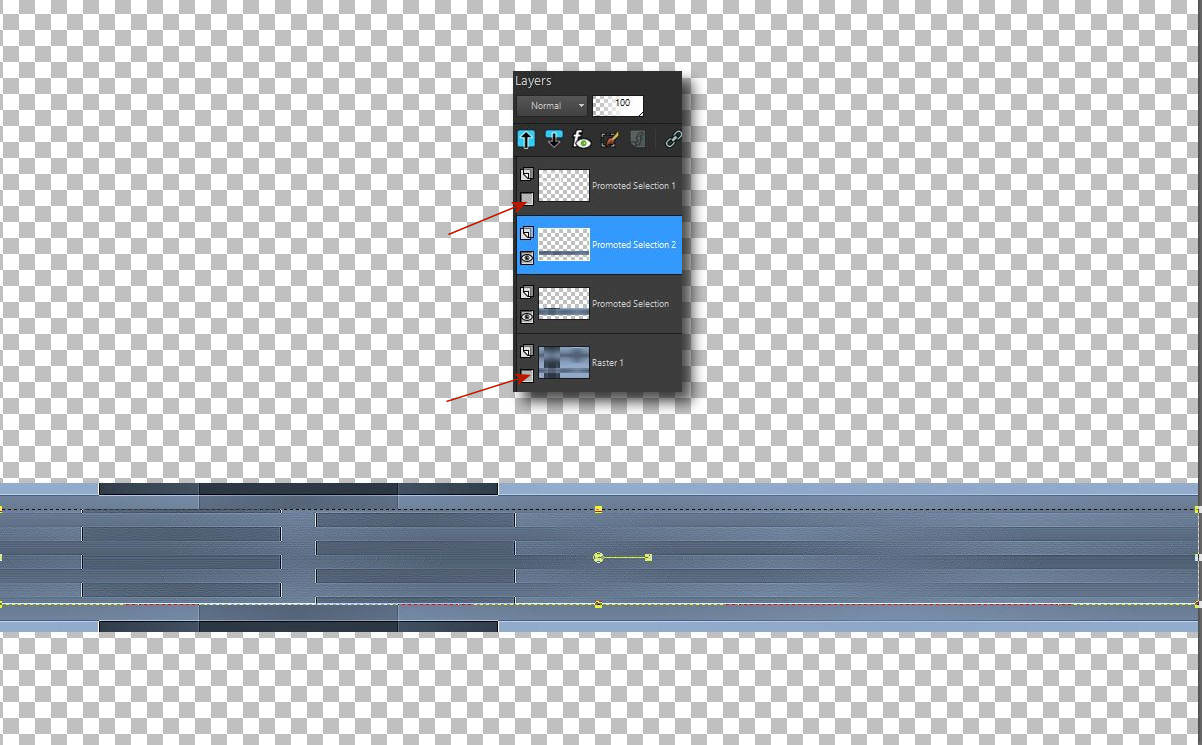
6. Csinálj egy ilyen kijelölést a felsö rétegen ahogy azt itt a képen látod.

​   Make a selection on the top layer, like you see here on the demo image

Picture

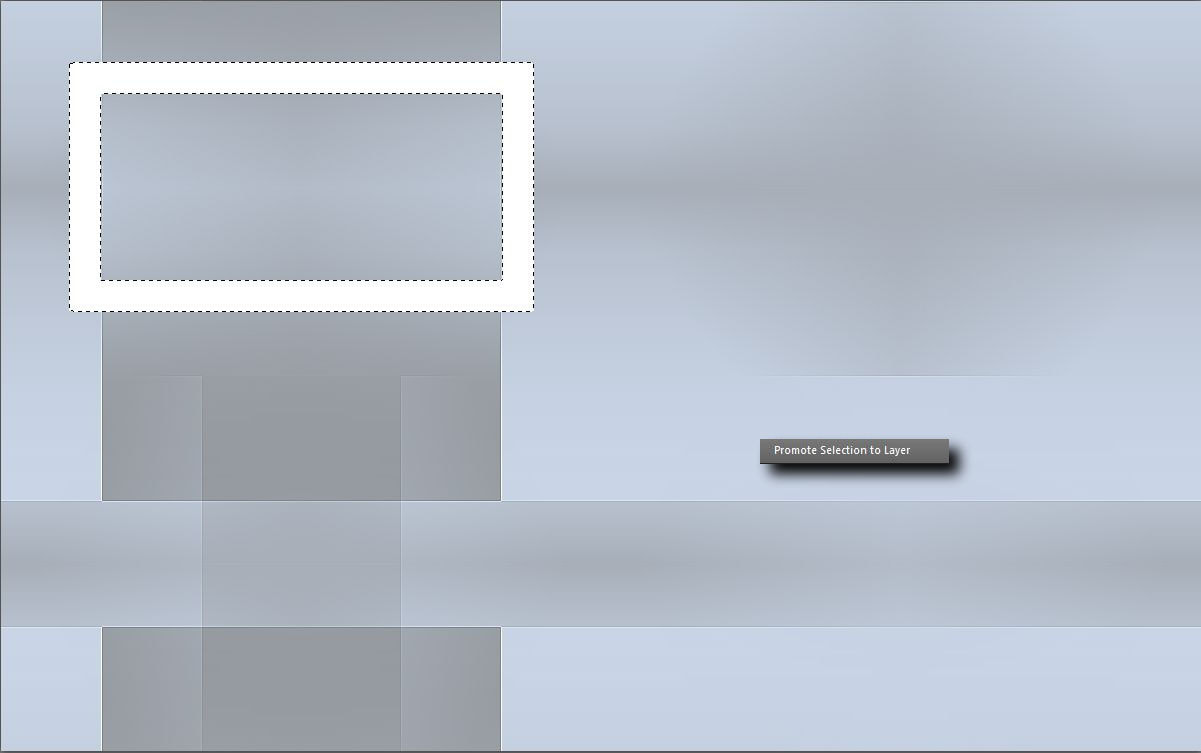
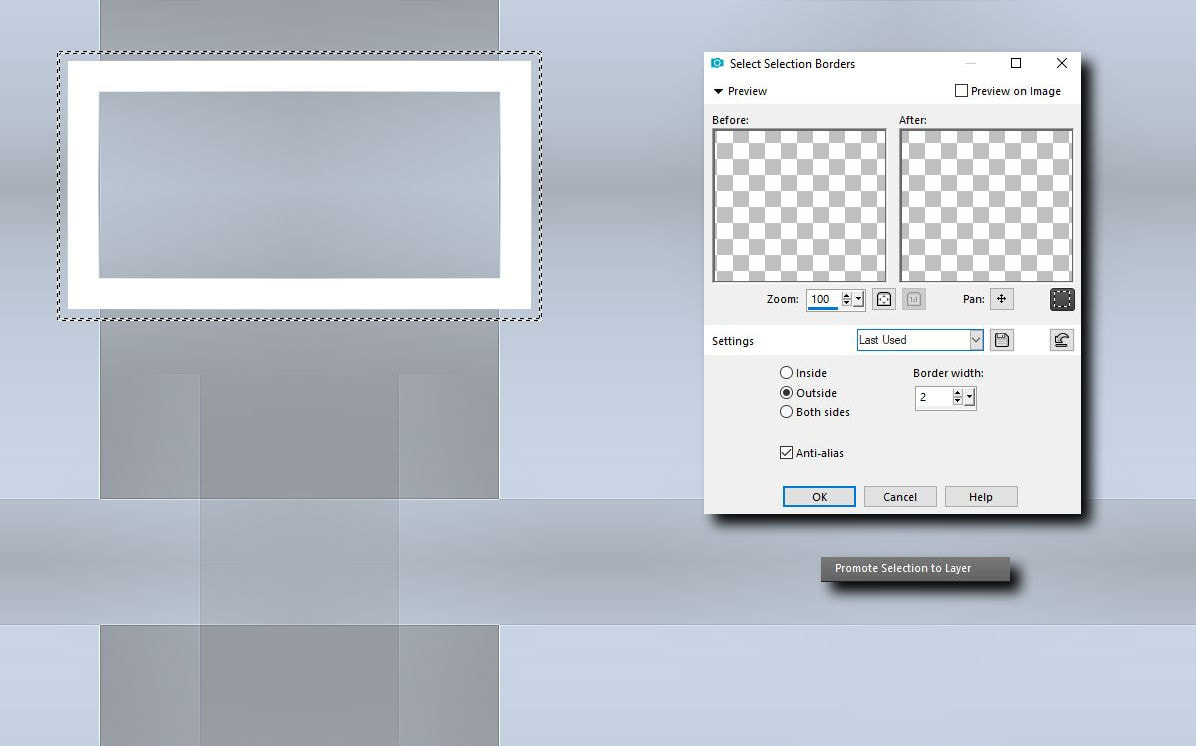
 7. Selection - Modify - Select Selection Borders 30

Picture

8. Promote Selection To Layer

Picture

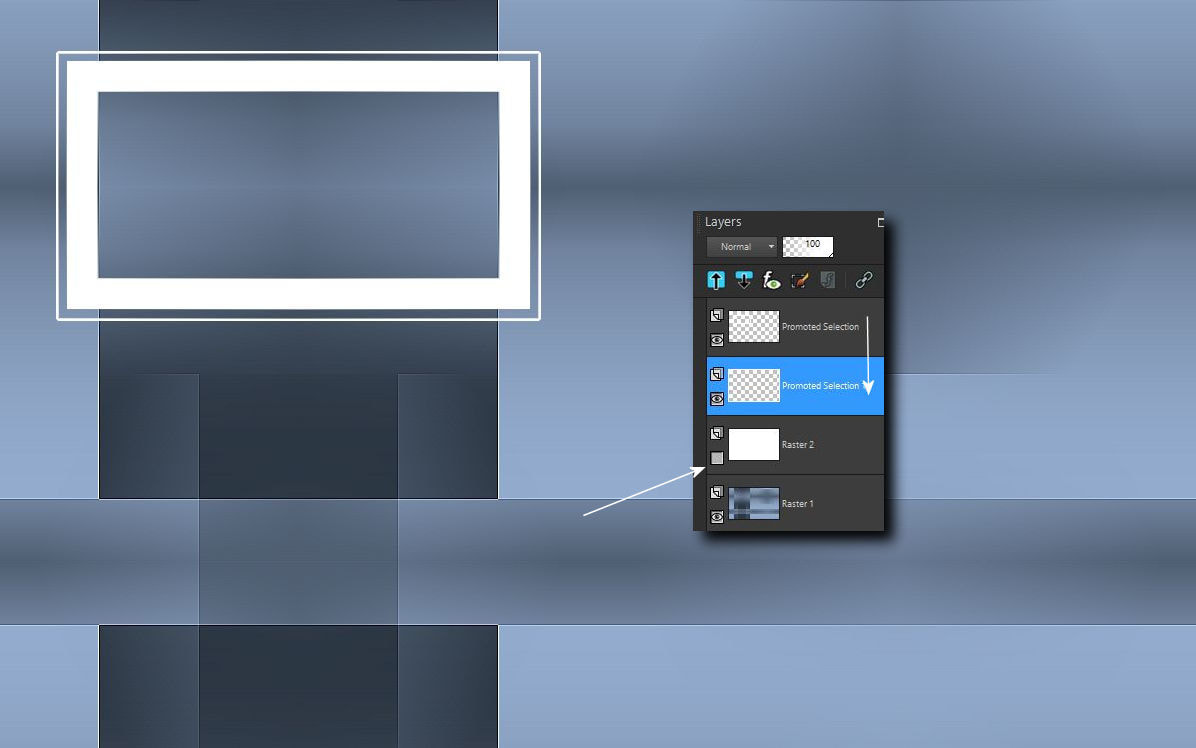
9. Ismét csinálj egy kijelölést a fehér rétegen a kereteden kívül.

   Make a selection on the white layer outside of your ready frame again

Picture

10. Selection - Modify - Select Selection Borders 2
​    Promote Selection To Layer

Picture

11. Csukd be a fehér réteg szemét. Add össze a két felsö réteget.

    Close the white layer's eyes. Merge down the two top layers.

Picture

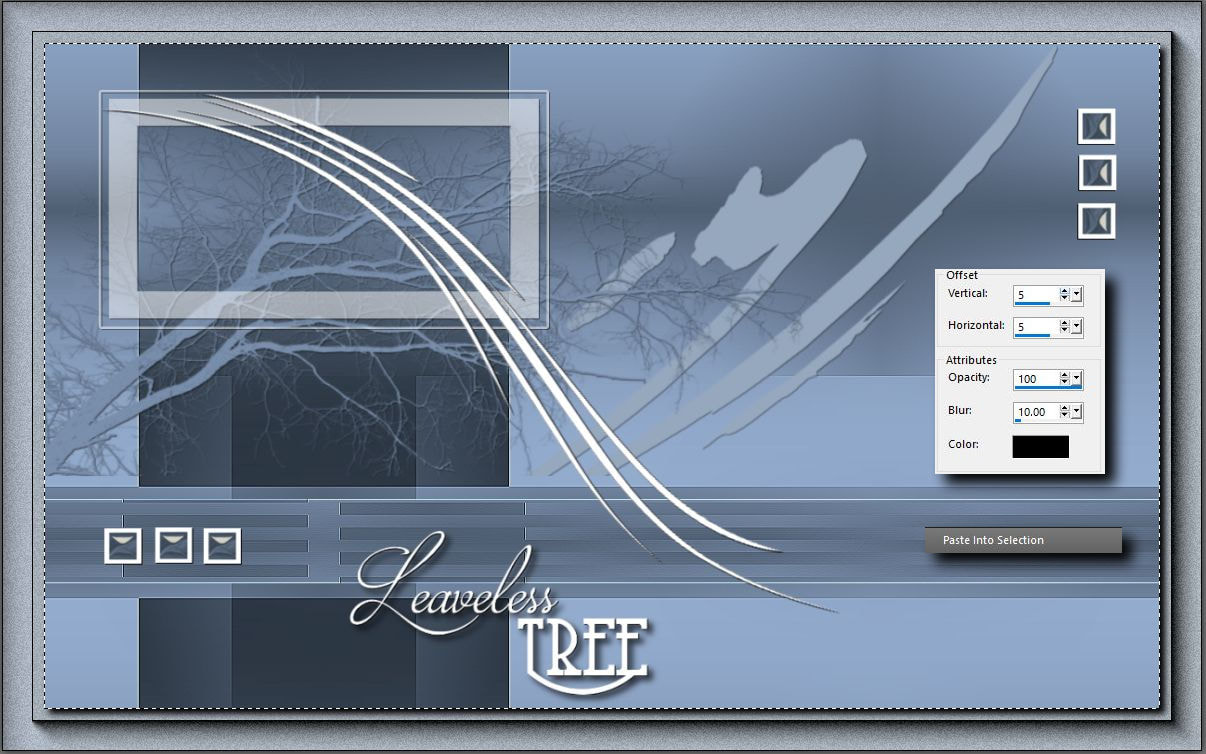
12. Tedd a felsö réteg blend modját 50%-ra
    Adj neki árnyékot.
    Töröld ki a fehér réteget.

    Blend mode of the top layer 50%
​    Effects - 3D Effects - Drop Shadow
    Delete the white layer

Picture

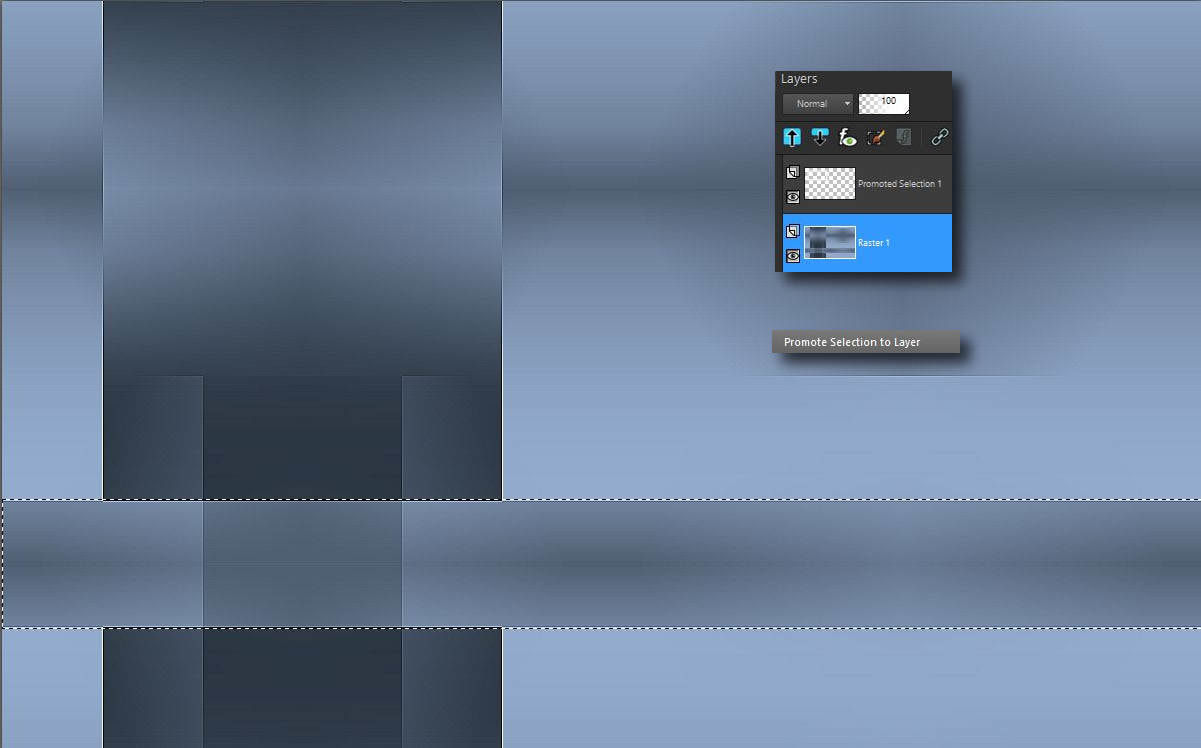
13. Állj az alsó rétegre és csinálj rajta egy ilyen kijelölést. majd promótáld azt.

​    Go to the bottom layer, make a selection and promote the selection to layer

Picture

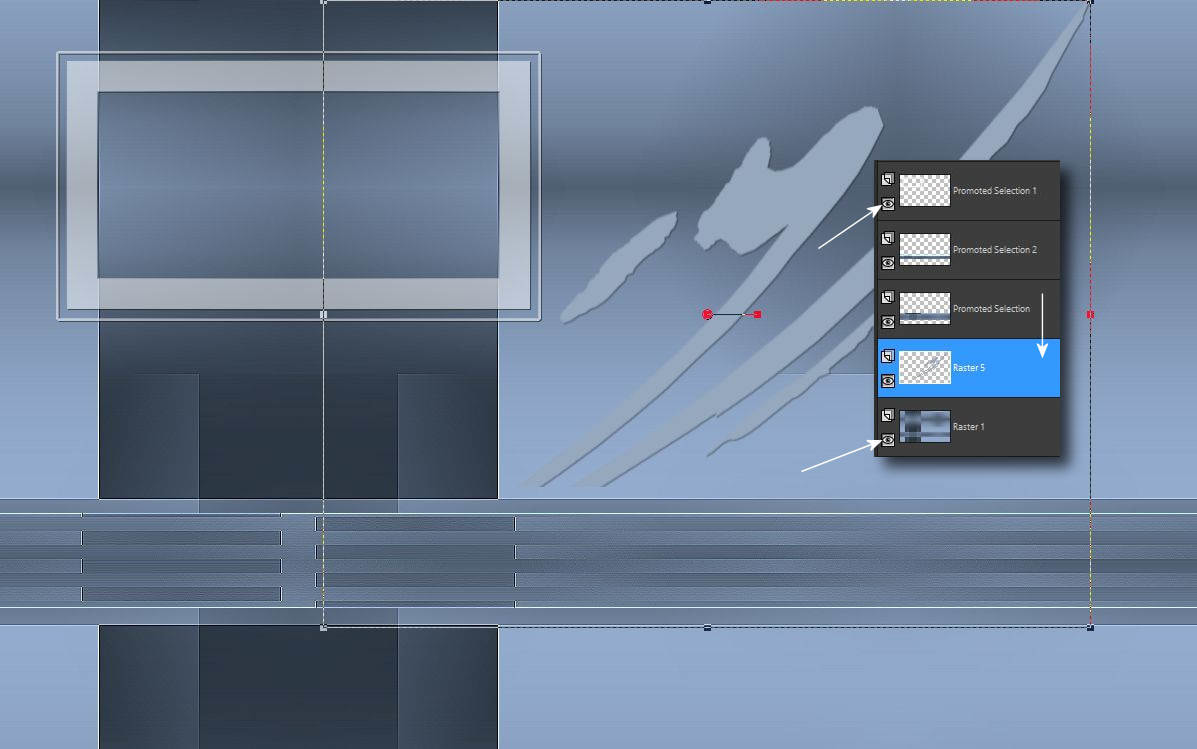
14. Csukd be az alsó és felsö rétegszemet,hogy jobban lásd a promótáld rétegedet.
    Hozd be a csomagból a VaZsu decor 3-at és másold be új rétegként.
    Pozícionáld be pontosan.

    Close the eyes of lower and upper layers to see your promoted layer better.
    Get the VaZsu decor 3 from the package and copy it as a new layer.
​    Position it exactly.

Picture

15. Nyisd ki a rétegszemeket ismét. Másold be a VaZsu decor 1-et a csomagból
    és pozícionáld azt a csíkrétegek alá.

    Open the eyes of the top and bottom layers again.
    Copy the VaZsu decor 1 from the material package and position it under
​    the strip layers.

Picture

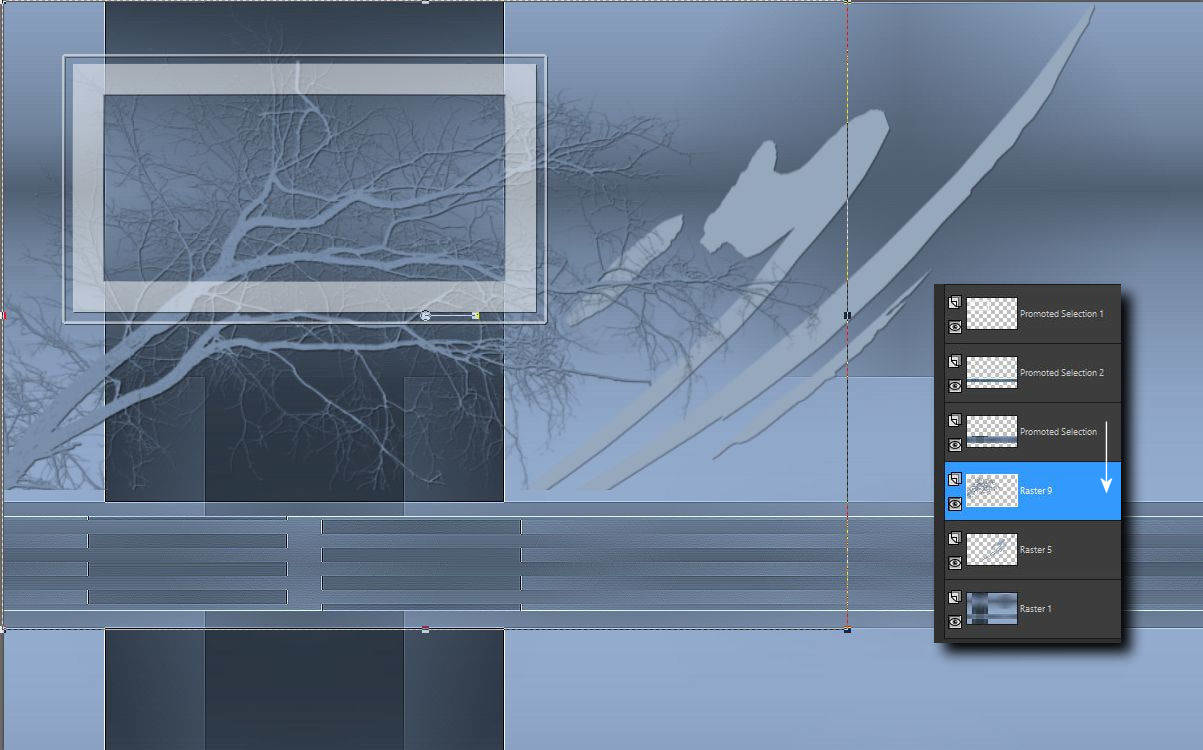
16. Másold be a csomagból a Tree decort és pozícionáld a réteget a képen látottak
    szerint.

    Copy from the package the Tree decor and position the layer like you saw
    on the demo image here.

Picture

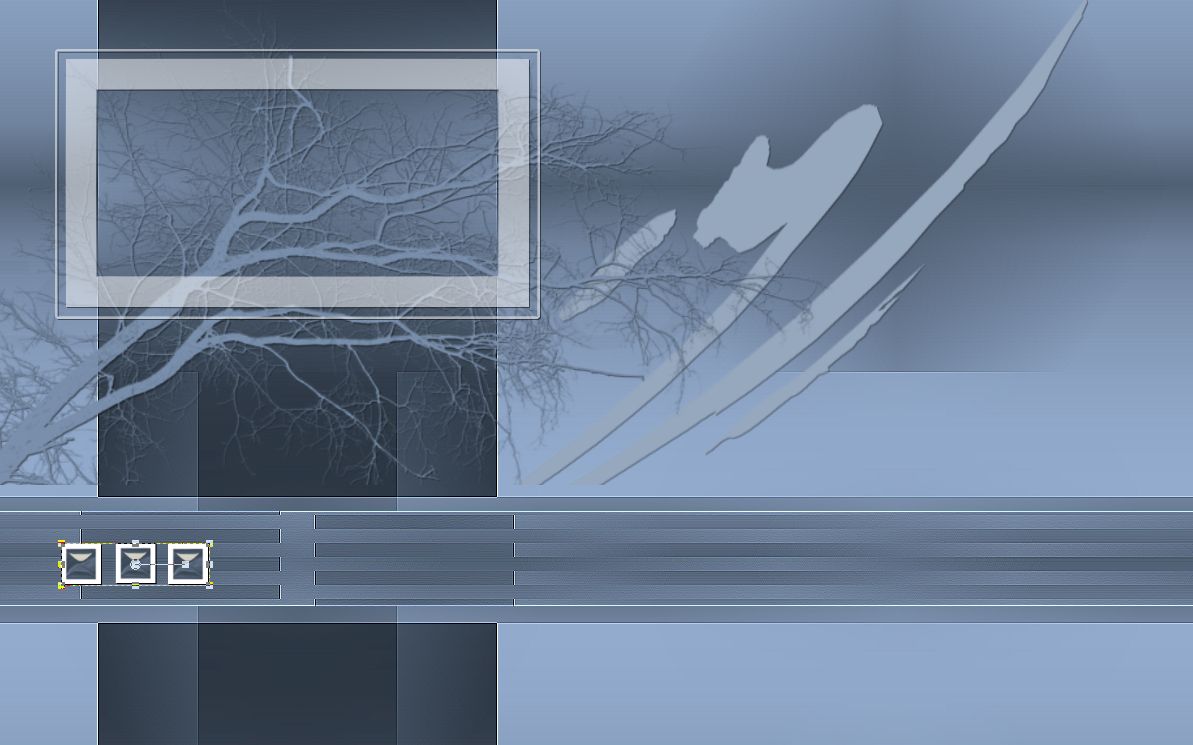
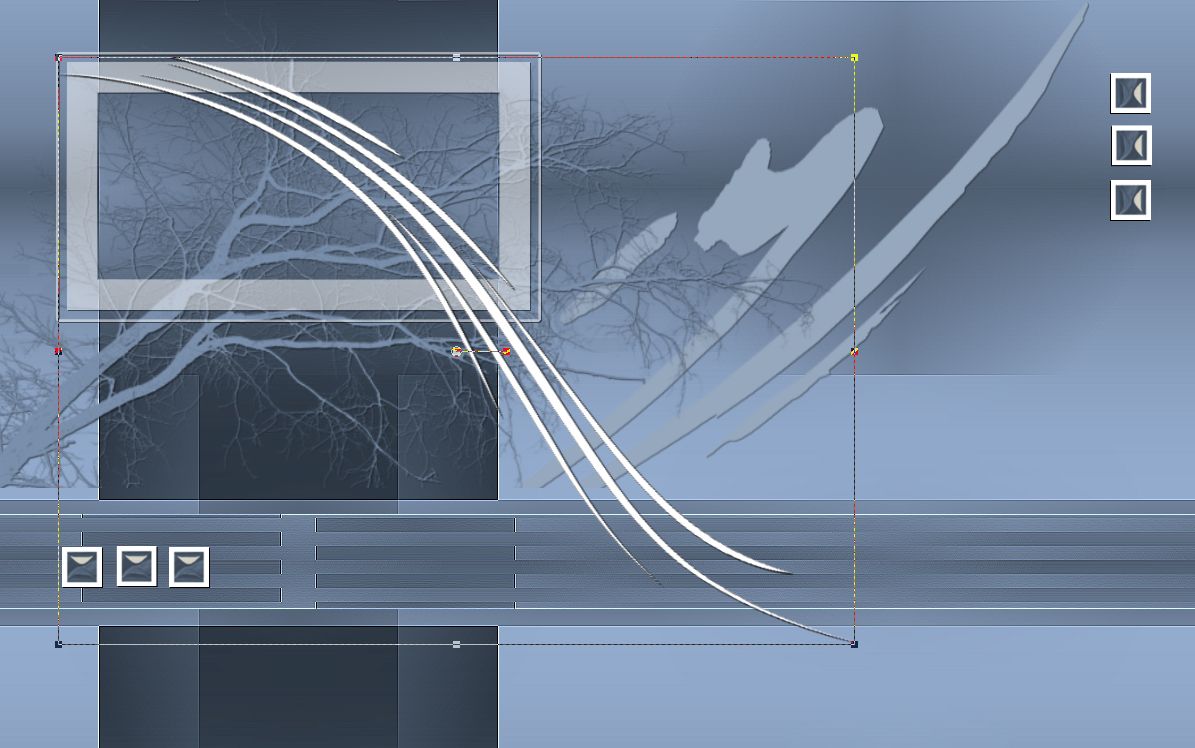
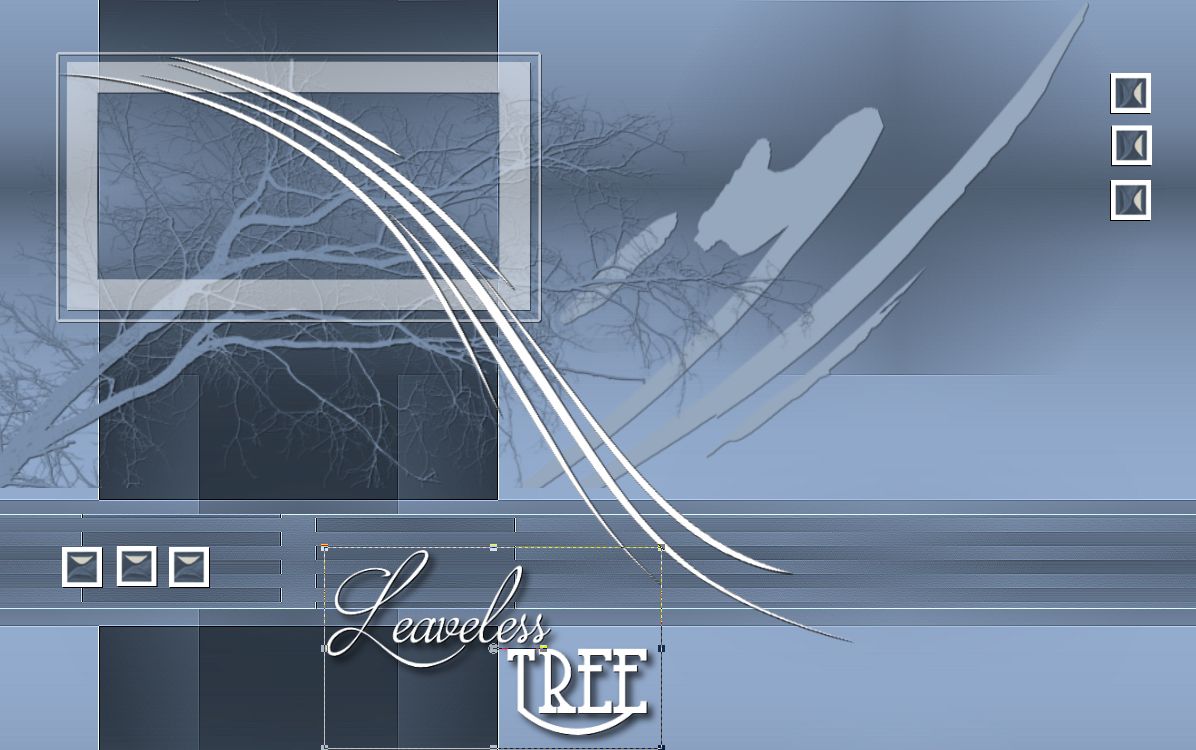
17. Kezdjünk díszíteni kövesd a képeken látottakat.

    Let's start decorating,  follow the photos you saw.

​    

Picture

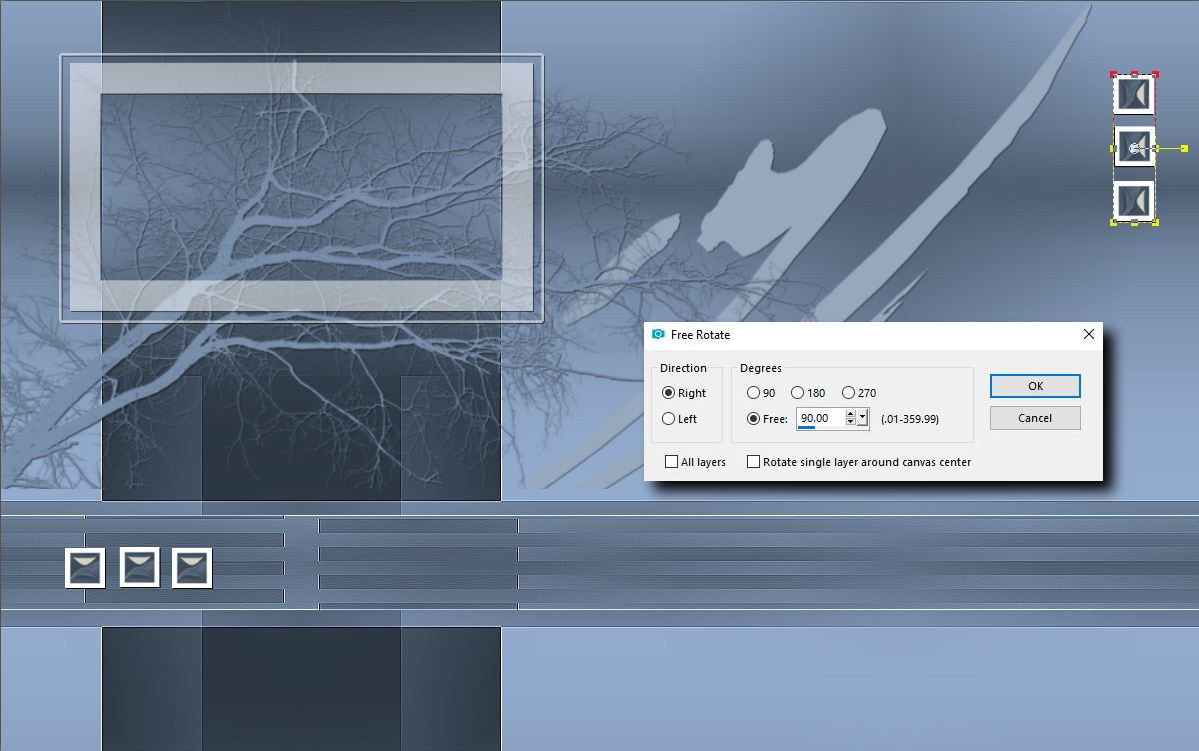
18. Image - Free Rotate

Picture

19.

Picture

20.

Picture

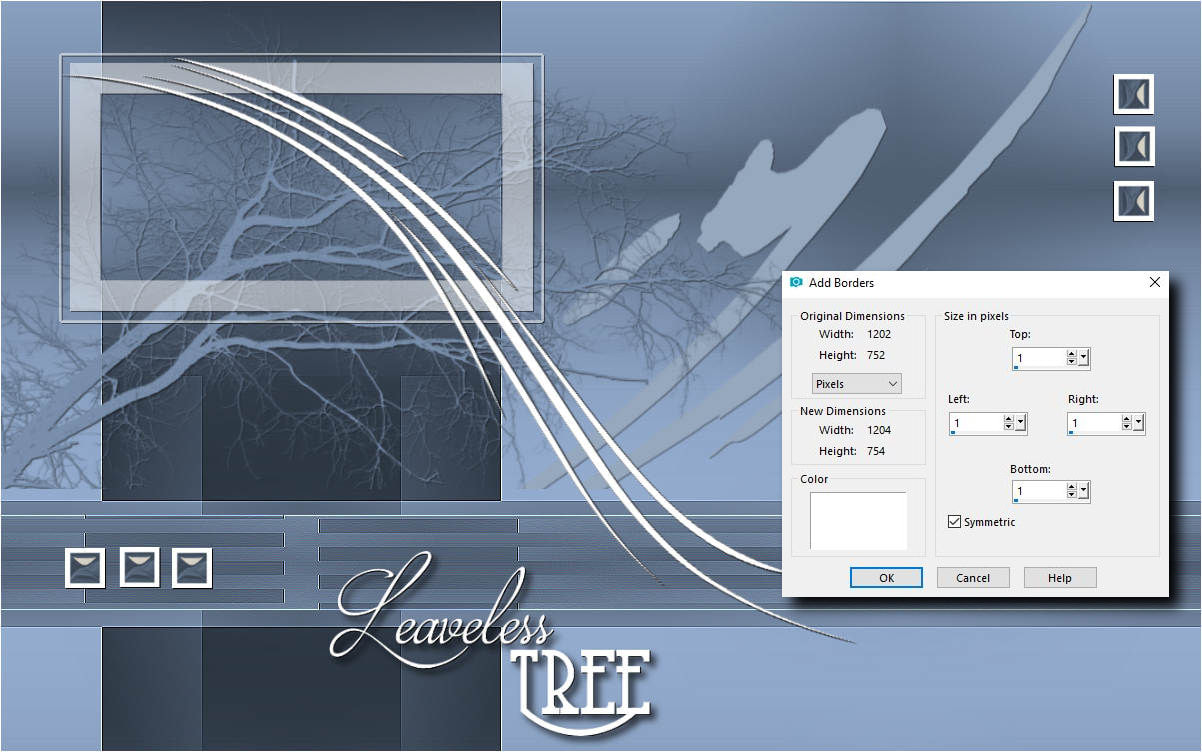
21. Image - Add Borders ( with white color )

Picture

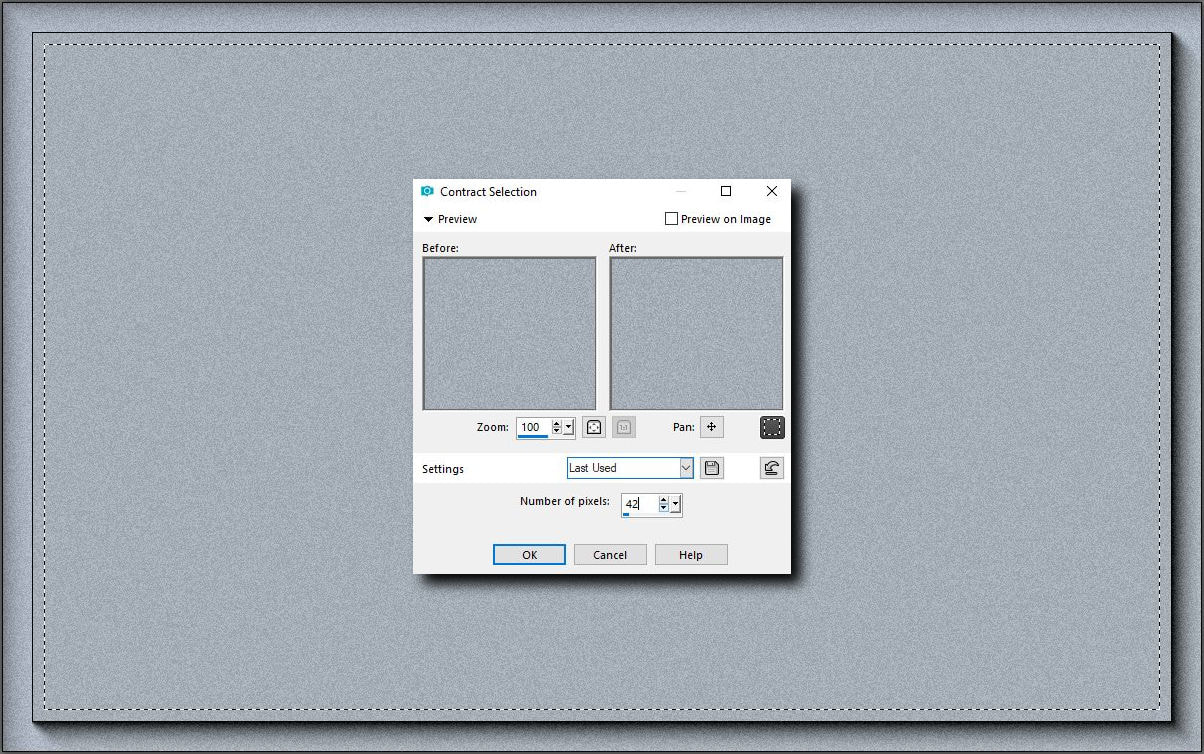
22. Hozd be a csomagból a Base image-t és tedd rá ezt a kijelölést.

     Load in the base image from your material package
     Selection - Select All
​     Selection - Modify - Contract 42

Picture

23. Másold be a kész képedet a kijelölésbe adj neki árnyékot és szüntesd meg a           kijelölést.

    Copy your finished image into the selection and add a shadow to it and
     Selection None

Picture

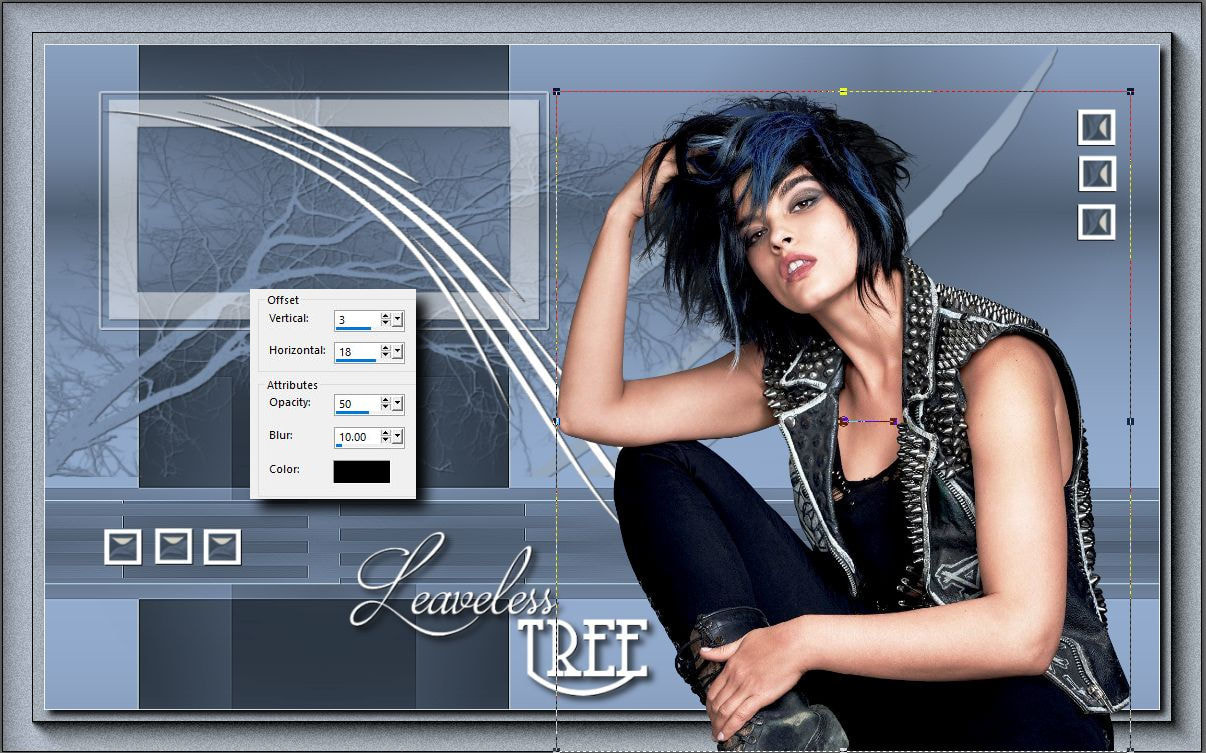
24. Helyezd el a Cady tubet a képeden és ne felejtsd el árnyékolni.

     Copy the Cady Tube on your image and do not forget to shade it.

Picture

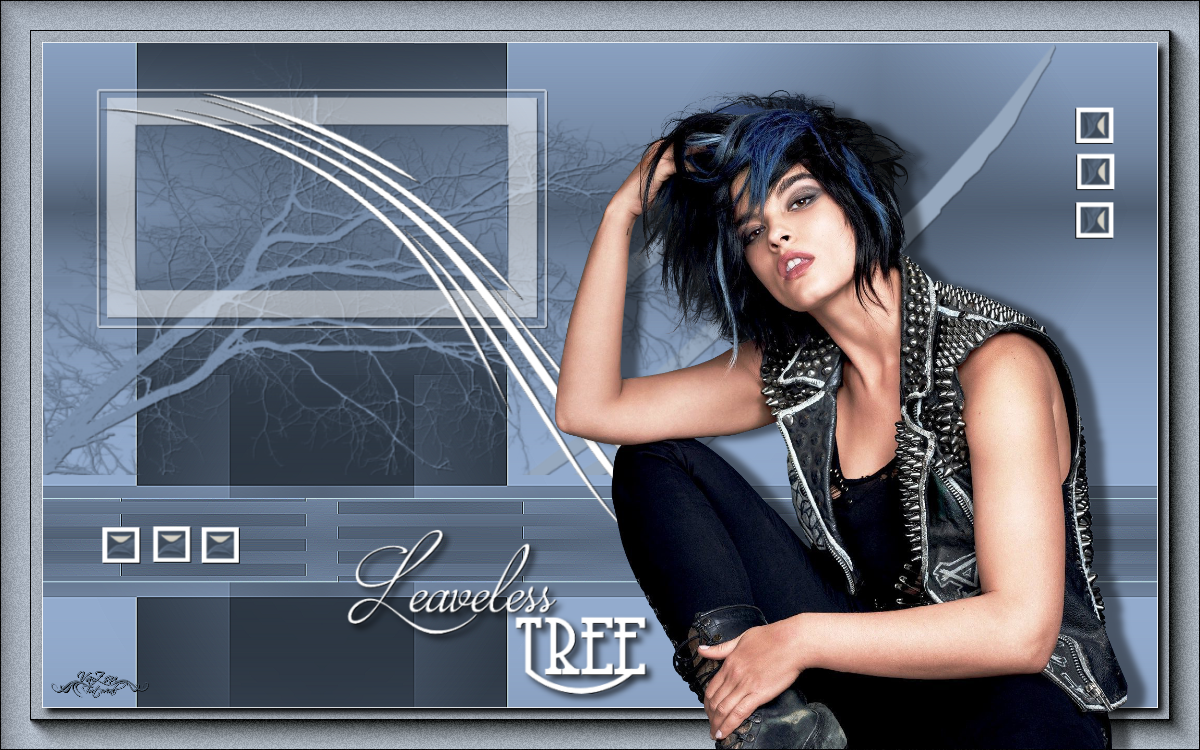
Gratulálok már készen is vagy. Remélem hamarosan látlak a következö tutorialnál.

Congratulation you're done! I hope I will see you by the next tutorial again.

Picture
Proudly powered by Weebly