VaZsu PSP Tutorials
  • Home
  • Looking Back
  • Tutorials 5
    • TUTORIALS 231 - 240 >
      • VaZsu Tutorial 231
      • VaZsu Tutorial 232
      • VaZsu Tutorial 233
      • VaZsu Tutorial 234
      • VaZsu Tutorial 235
      • VaZsu Tutorial 236
      • VaZsu Tutorial 237
      • VaZsu Tutorial 238
      • VaZsu Tutorial 239
      • VaZsu Tutorial 240
    • Tutorials 241 - 250 >
      • VaZsu Tutorial 241
      • VaZsu Tutorial 242
      • VaZsu tutorial 243
      • VaZsu Tutorial 244
      • VaZsu Tutorial 245
      • VaZsu Tutorial 246
      • VaZsu Tutorial 247
      • VaZsu Tutorial 248
      • VaZsu Tutorial 249
      • VaZsu Tutorial 250
    • Tutorials 251 - 260 >
      • VaZsu Tutorial 251
      • VaZsu Tutorial 252
      • VaZsu Tutorial 253
      • VaZsu Tutorial 254
      • VaZsu Tutorial 255
      • VaZsu Tutorial 256
      • VaZsu Tutorial 257
      • VaZsu Tutorial 258
      • VaZsu Tutorial 259
      • VaZsu Tutorial 260
    • Tutorials 261 - 265 >
      • VaZsu Tutorial 261
      • VaZsu Tutorial 262
      • VaZsu Tutorial 263
      • VaZsu Tutorial 264
      • VaZsu Tutorial 265
  • Pastel Style Tutorials
    • Tutorials 266 - 270 >
      • VaZsu Tutorial 266
      • VaZsu Tutorial 267
      • VaZsu Tutorial 268
      • VaZsu Tutorial 269
      • VaZsu Tutorial 270
    • Tutorials 271 -280 >
      • VaZsu Tutorial 271
      • VaZsu Tutorial 272
      • VaZsu Tutorial 273
      • VaZsu Tutorial 274
      • VaZsu Tutorial 275
      • VaZsu Tutorial 276
      • VaZsu Tutorial 277
      • VaZsu Tutorial 278
      • VaZsu Tutorial 279
      • VaZsu Tutorial 280
    • Tutorials 281 - 290 >
      • VaZsu Tutorial 281
      • VaZsu Tutorial 282
      • VaZsu Tutorial 283
      • VaZsu Tutorial 284
      • VaZsu Tutorial 285
      • VaZsu Tutorial 286
      • VaZsu Tutorial 287
      • VaZsu Tutorial 288
      • VaZsu Tutorial 289
      • VaZsu Tutorial 290
    • Tutorials 291 - 300 >
      • VaZsu Tutorial 291
      • VaZsu Tutorial 292
      • VaZsu Tutorial 293
      • VaZsu Tutorial 294
      • VaZsu Tutorial 295
      • VaZsu Tutorial 296
      • VaZsu Tutorial 297
      • VaZsu Tutorial 298
      • VaZsu Tutorial 299
      • VaZsu Tutorial 300
    • Tutorials 301 - 400 >
      • VaZsu Tutorial 301
      • VaZsu Tutorial 302
      • VaZsu Tutorial 303
      • VaZsu Tutorial 304
  • Bouquet Editing
    • VaZsu Bouquets
    • Bouquet Tutorials 1. >
      • Whisper About Fall
      • Sweet Things
      • Romantic Bouquet
      • Burgundy Beauty
      • Precious Moments
      • Lovely Vintage
      • Autumn Feeling
      • Tender Memory
      • Grey Miracle
      • My Darling
    • Bouquet Tutorials 2. >
      • Ghotic Feeling
      • Timeless Memory
      • Little Garden
      • Moments In Time
      • Colorful Love
      • Bouquet For My Love
      • Green Valentine's
      • Sunflowers and Irises
      • Artificial Beauty
      • Magnolias For My Love
  • SINEDOT ARTS
    • Before Starts With Sinedots
    • Mi mit jelent
    • VaZsu Sinedot Tutorials >
      • Sinedot Tutorial 1
      • Sinedot Tutorial 2
      • Sinedot Tutorial 3
      • Sinedot Tutorial 4
      • Sinedot Tutorial 5
      • Sinedot Tutorial 6
      • Sinedot Tutorial 7
  • Treasures to Pastell Images
    • PNG Flowers Images
    • Exclusive Png Roses
    • Pastel blurry backgrounds
    • Watercolor painted png flowers
    • VaZsu Wild Flowers Masks
    • Dry Flowers I. PNG
    • Dry Flowers II. PNG
    • Dry Plants PNG
  • Editorial Practices
    • Make a Selection Tool
    • Creative Button 1
    • Creative Button 2
  • VaZsu Videos
    • Karácsonyi Rege

Picture

Picture

Ezt a bemutatót a körök és az egyenes vonalak összhatása jellemzi.
Remélhetöleg mindenki idetalál az új lapra és méltó lesz ez a bemutató arra, hogy egy újabb fejezetet nyissunk.

​Külön köszönet Cdy-nak a nöi tubeért. Még több tubet itt találsz töle.

CADY TUBES
Picture
t_231_pack.rar
File Size: 807 kb
File Type: rar
Download File

Special thanks for my friends for translate this tutorial to French, Dutch and Spanish language.

Picture
Translate

   Violette

Picture
Translate

MoonLightAngel
      Lisette

Picture
Translate

      Tati


Picture

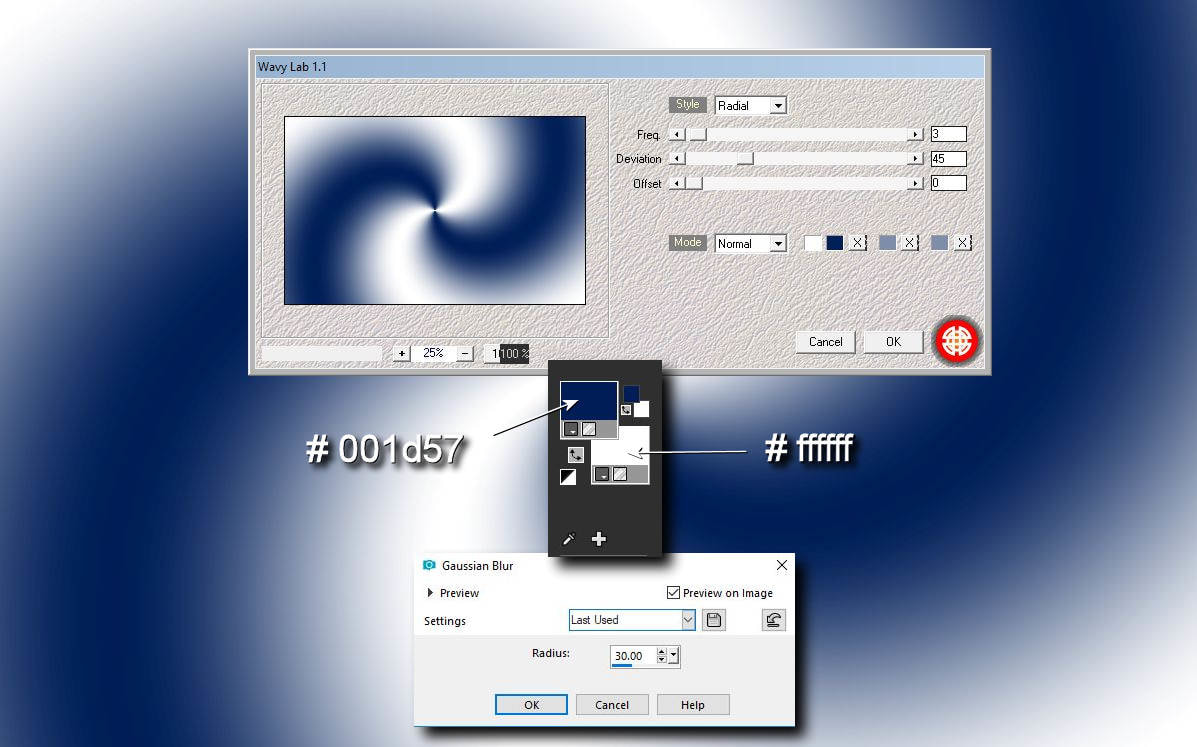
1. Hozz be egy üres lapot állítsd be a színpalettáidat és tedd rá ezt a szüröt.
   Majd blúrozd meg egy kicsit.

   Load in the new transparent background, set up your color palettes.
    Effects - Plugins - Mehdi - Wavy Lab
​    Adjust - Blur - Gaussian blur

Picture

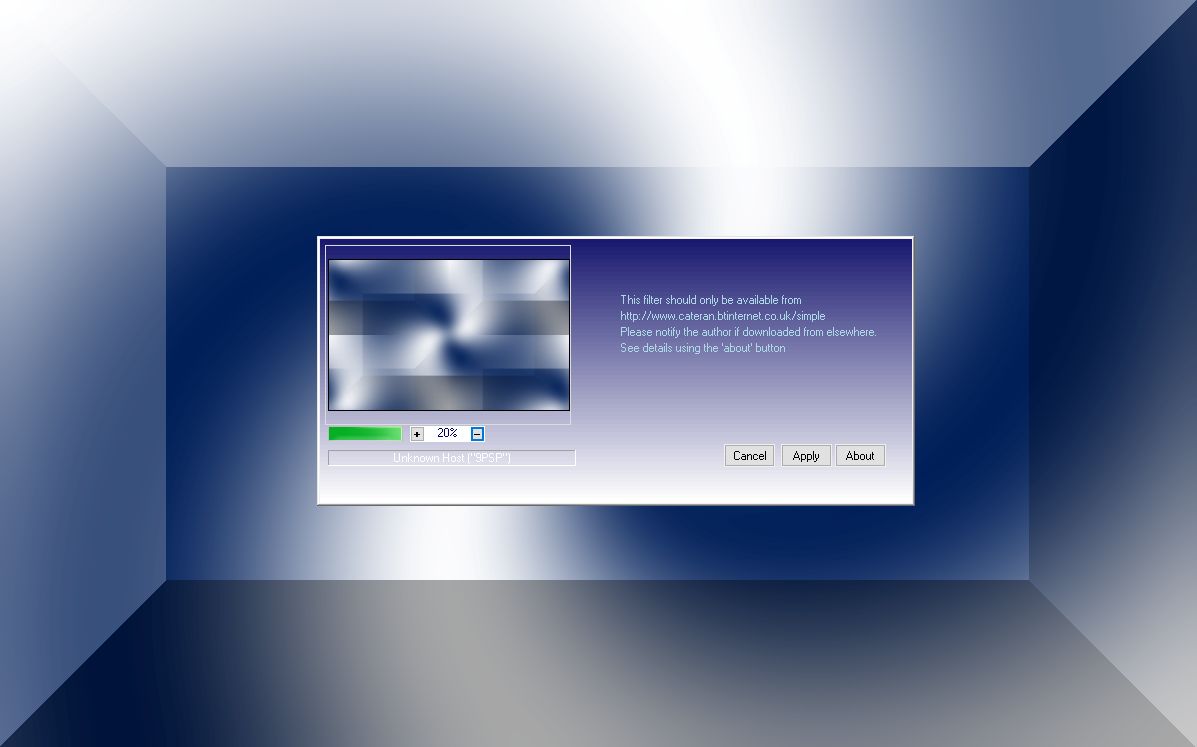
2. Effects - Plugins - Filters Unlimited - Toadies

Picture

3. Effects - Plugins - Simple - Quick Tile

Picture

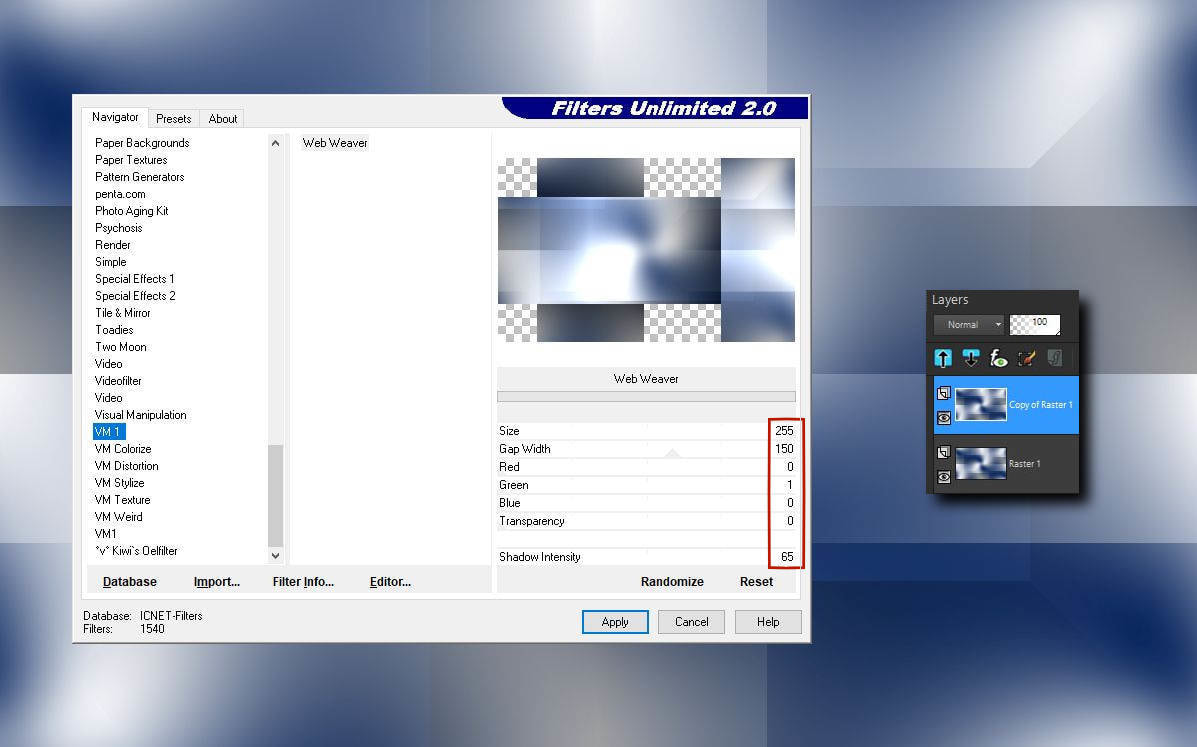
4. Duplázd meg a réteget és a felsöre tedd rá ezt a szüröt.

   Layers duplicate. Stay on top layer
   Effects - Plugins - Vm1 - Web Weaver

Picture

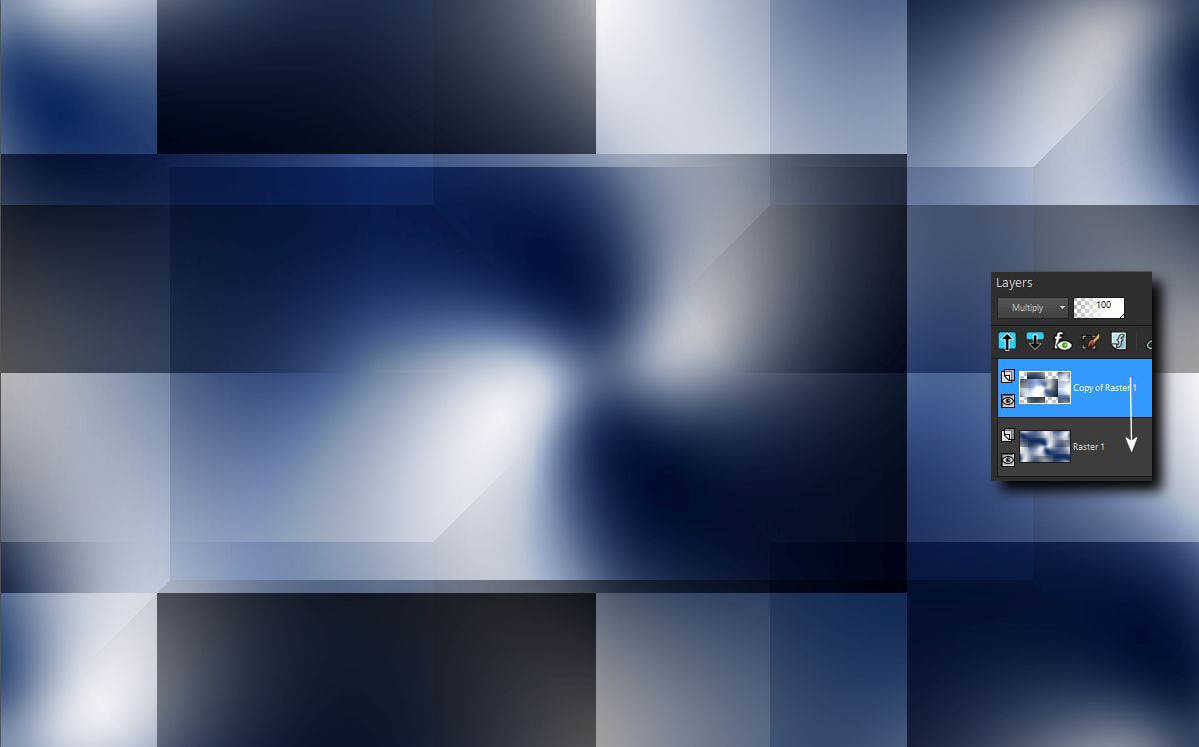
5. Add össze a rétegeket. Ezeknek a szüröknek az ilyen sorrendben való használata
   nem minden esetben adják ezeket a színeket meg bizonyos corel programokban
   eltérö computereken.
   Amennyiben az eredményed a színeiben eltér ( túl világos lesz ) használd a     csomagban levö step 5 lapot a továbbaiakban.

  Layers - Merge Visible
 If the result on your computer is different colors ( to light ) by this step, use the step 5 sheet from your material package. Sometimes it's happened with different Corel program and on different computer.

Picture

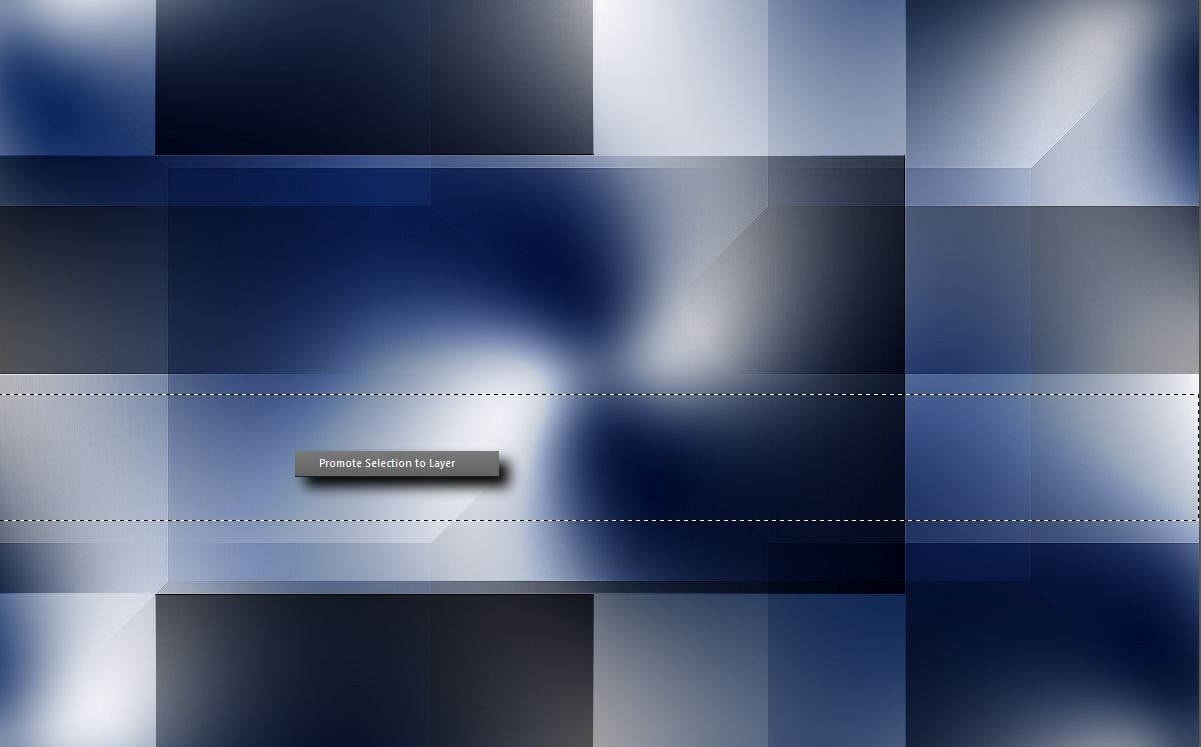
6. Csinálj egy ilyen kijelölést és promótáld azt.

   Make a selection like you see on the demo image.
   Selection - Promote Selection to Layer

Picture

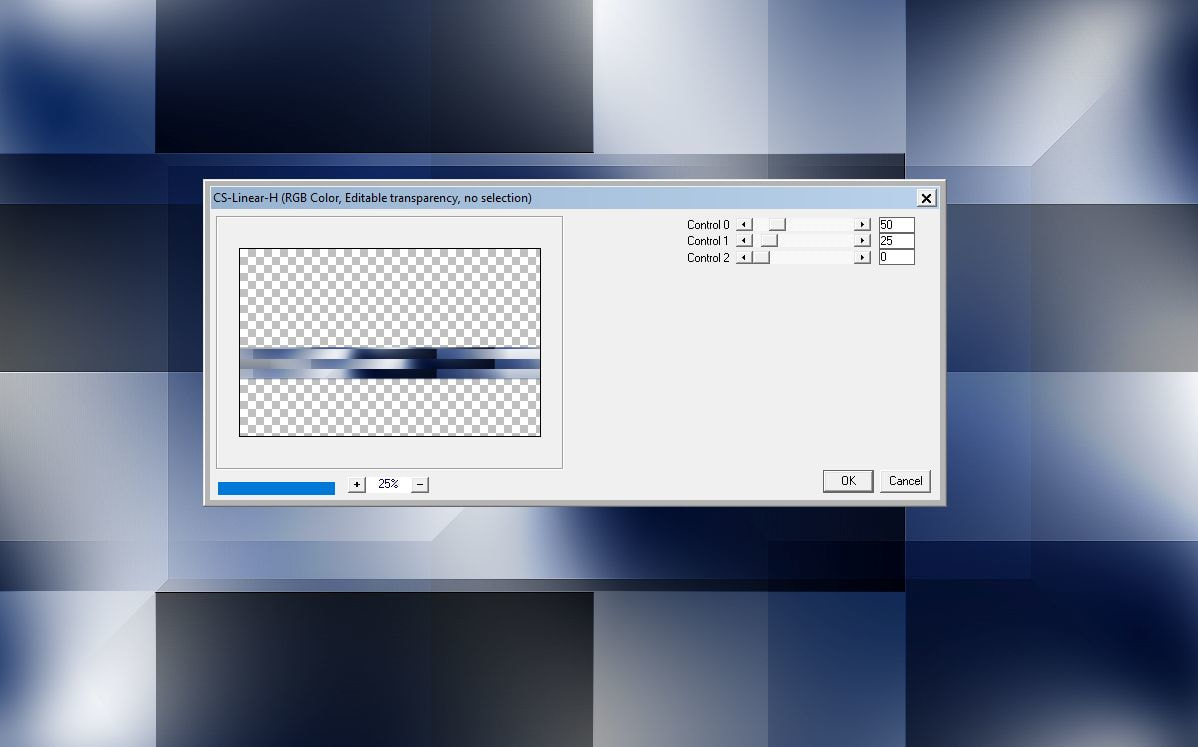
7. Tedd rá a promótált rétegre ezt a szüröt.

   Stay on the promoted layer
   Effects - Plugins - Caroline And Sensibility - Cs Linear - H

Picture

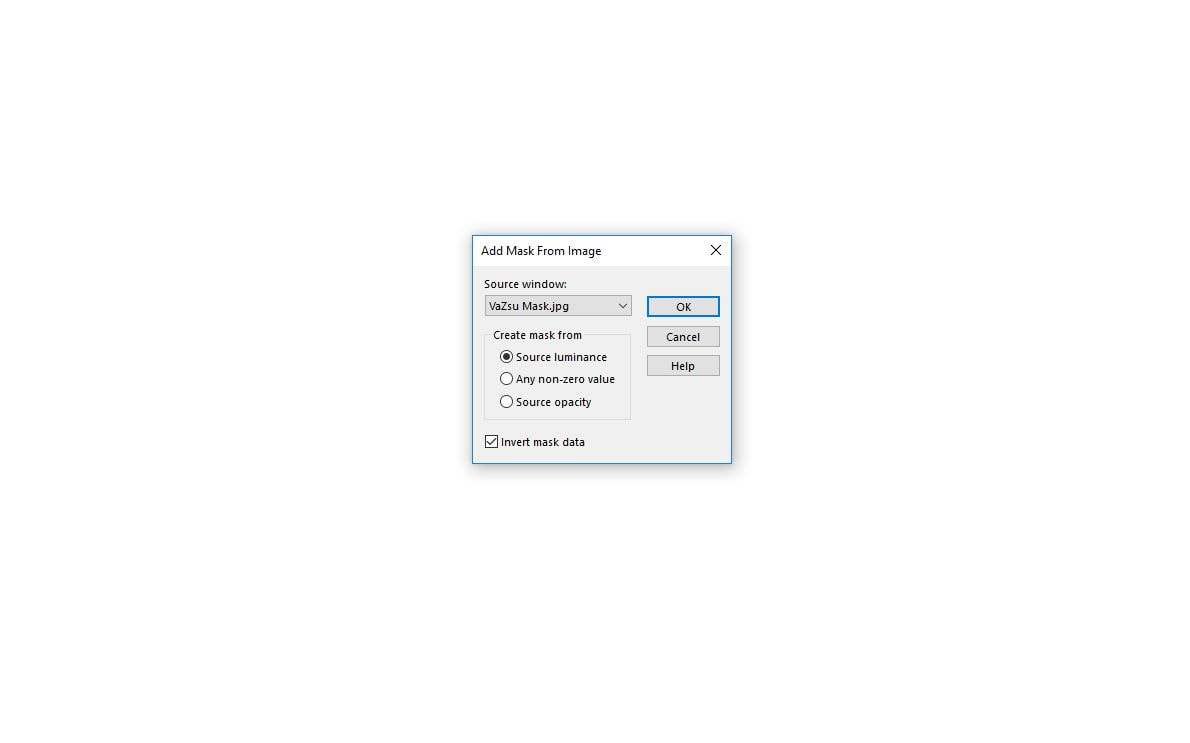
8. Hozz be egy üres lapot és a VaZsu maszkot.
   Önts ki a lapot fehér színnel, majd csináld meg a maszkolást.

   Load in the new transparent background and fill up with white color.
​    Load in the VaZsu Mask from your material package and do the mask on it.

Picture

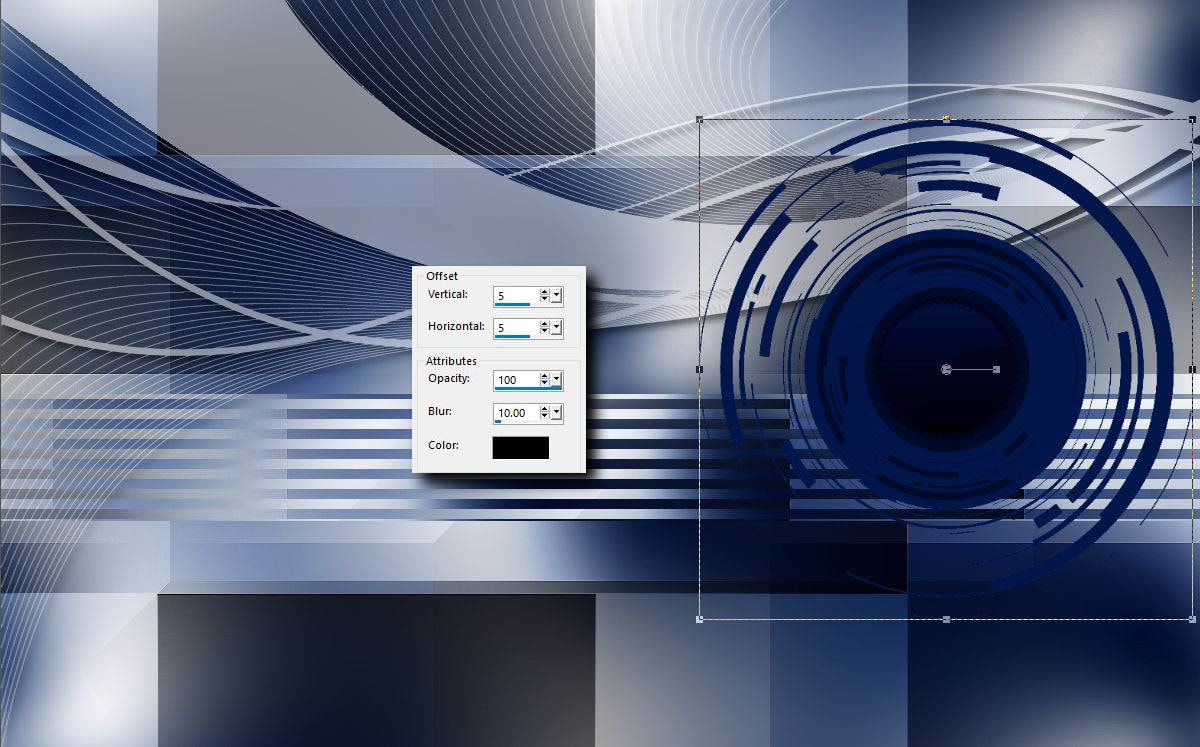
9. Helyezd el a maszkot a képeden és adj neki árnyékot.

​   Paste the mask into your image and do the drop shadow.

Picture

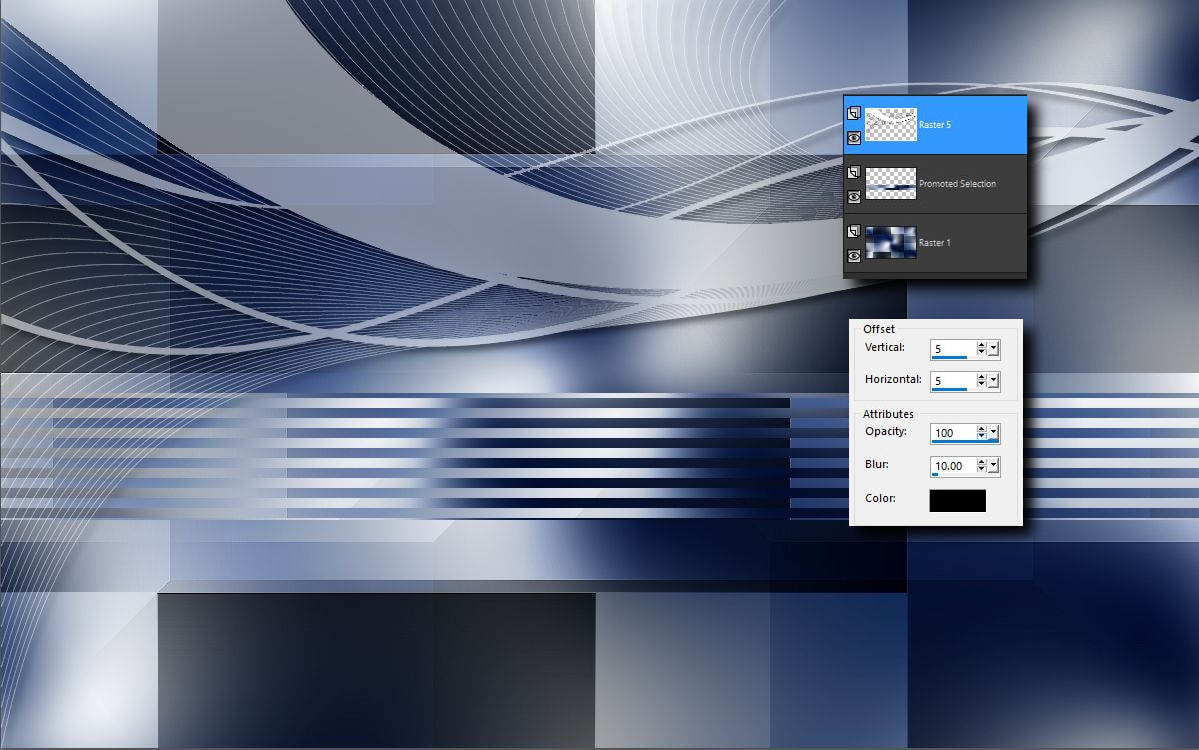
10. Kezdjünk el díszíteni, kövesd a képeken látottakat. Pozícionálj pontosan.
    Let's start decorating our picture. Follow the tutorial images.
    Position it exactly!

Picture

11.

Picture

12.

Picture

13.

Picture

14.

Picture

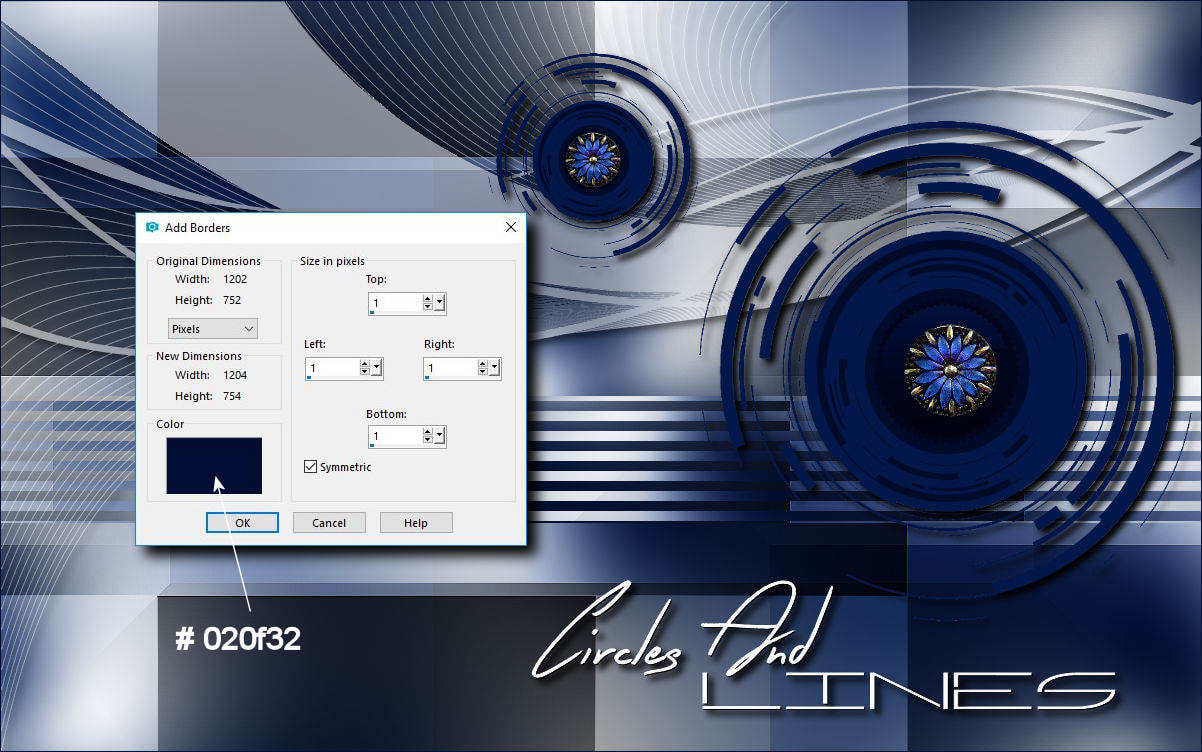
15. Image - Add Borders

Picture

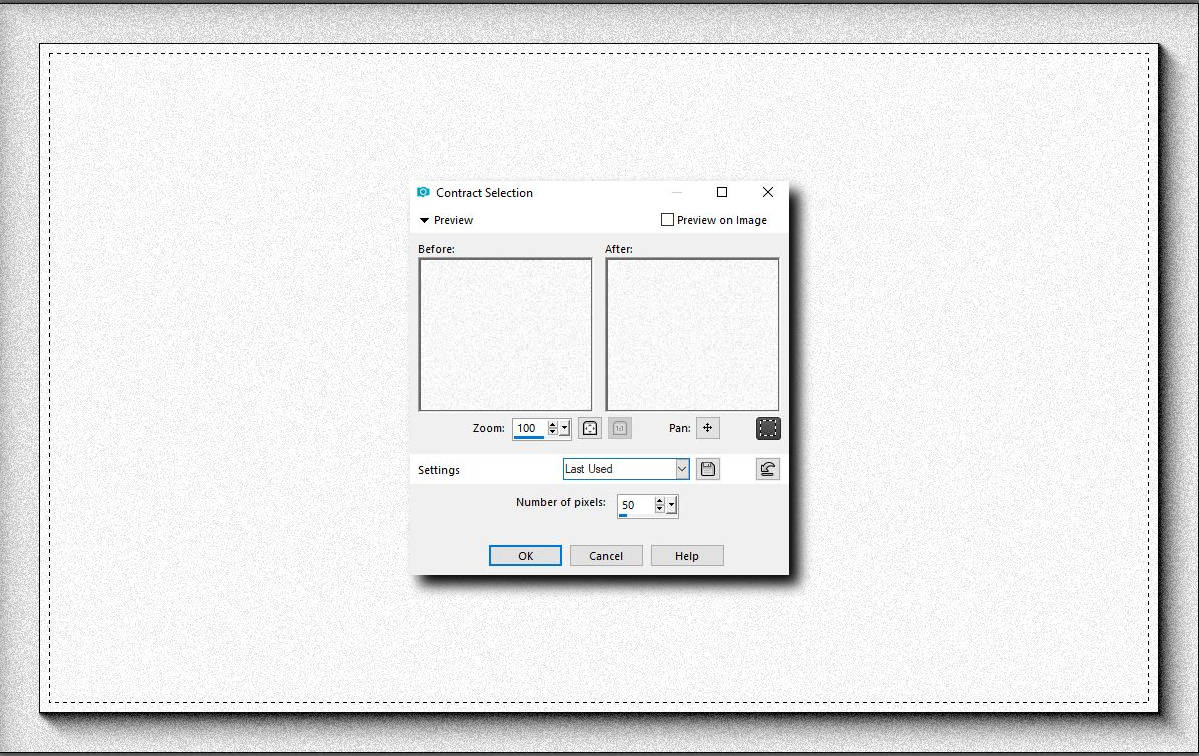
16. Hozd be a base image-t a csomagból és tedd rá ezt a kijelölést.

    Load in the base Image from your material package.
    Selection - Select All
​    Selection - Modify - Contract 50

Picture

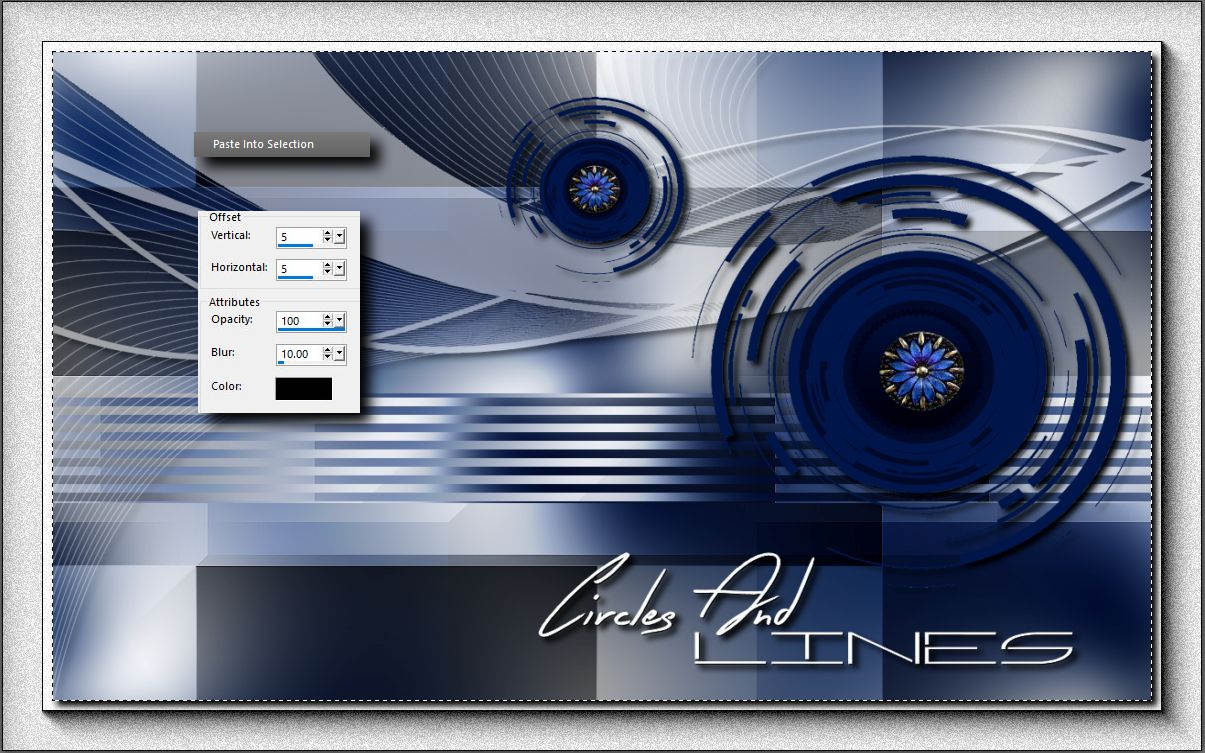
17. Másold be a képedet a kijelölésbe és adj neki árnyékot.
    Szüntesd meg a kijelölést.
​
    Copy your image to the selection and give it a shadow.
    Selection None

Picture

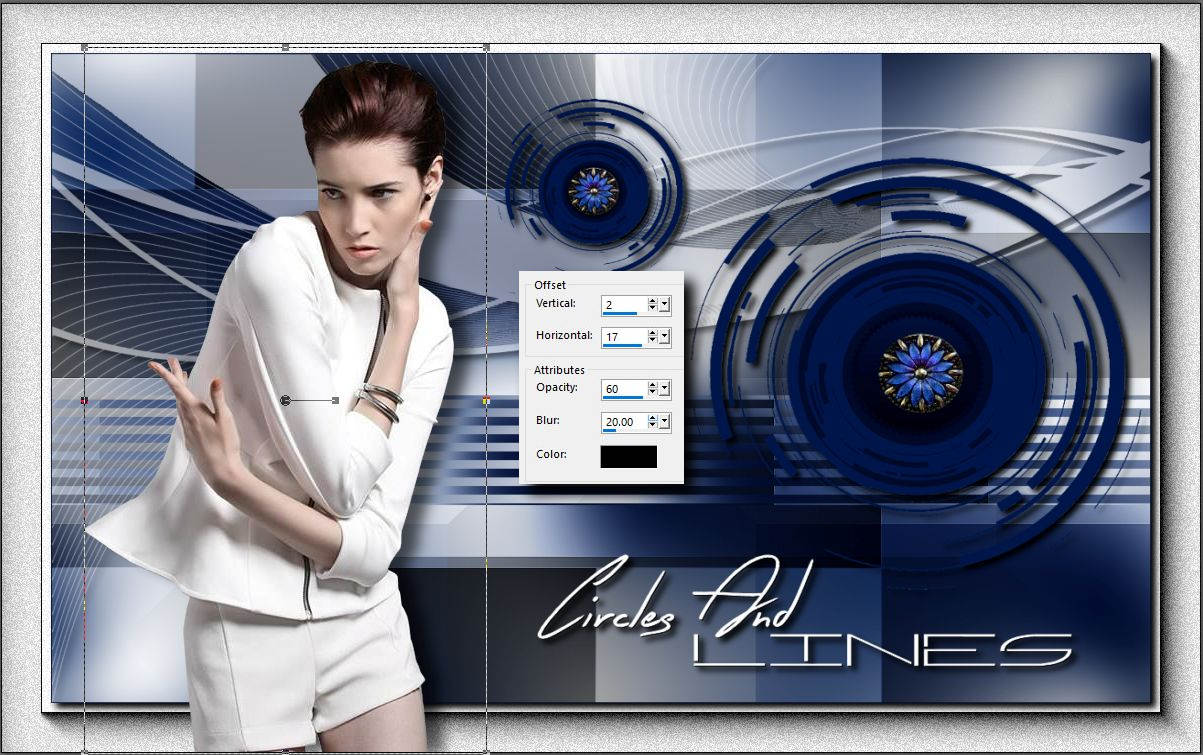
18. Helyezd el a Cady tubet a képeden és adj neki árnyékot.

    Copy the Cady tube to your image and give it a shadow.

Picture

Gratulálok már készen is vagy. Ezzel az egyszerü, gyors tutoriallal nyitottuk meg ezt az új lapot. Remélem elnyerte a tetszésedet és hamarosan viszont látlak ismét a következö tutorialban.

Congratulations you're done!  I hope I will see you soon again by the next tutorial.


Picture
Proudly powered by Weebly